Welcome to the Craft Cupboard!
Here you will find ideas for crafts of all kinds. Whether you like to do crafts all the time or just once in awhile, you'll find something fun to do on this page. There are simple crafts and challenging crafts to please all ages. Have fun and enjoy your crafting!
Here you will find ideas for crafts of all kinds. Whether you like to do crafts all the time or just once in awhile, you'll find something fun to do on this page. There are simple crafts and challenging crafts to please all ages. Have fun and enjoy your crafting!
Bird Helper
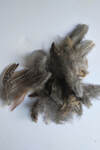
Birds need material to build a nest. Pioneer children would use items they found in nature to help their feathered friends. You can help the birds in your yard.
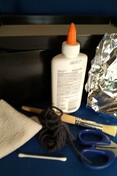
Here's what you could use: pinecone, string, lint from dryer, wool, milkweed fluff, cattail fluff, sticks, dried leaves
Stick the items you collect into the pinecone so the birds can pick them out to use. You could hang your pinecone from a piece of yarn where you see birds in your yard.
Here's what you could use: pinecone, string, lint from dryer, wool, milkweed fluff, cattail fluff, sticks, dried leaves
Stick the items you collect into the pinecone so the birds can pick them out to use. You could hang your pinecone from a piece of yarn where you see birds in your yard.

materials needed
|
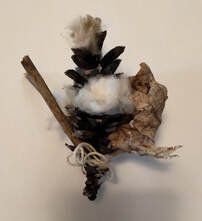
finished bird helper
|
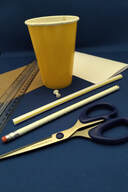
Paper Weaving
You will need:
2 sheets of different coloured paper
ruler, tape, pencil
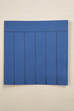
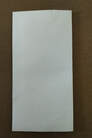
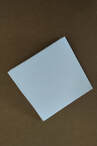
Step 1: Cut the paper to form squares 12 cm by 12 cm.
(Pic 1)
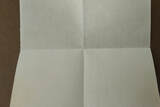
Mark dots every 2 cm along opposite edges of one paper.
(Pic 2)
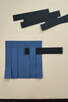
Cut along the lines making strips.
(Pic 3)
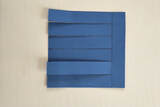
On the second paper, draw a line across the paper 2 cm from the edge. Then mark dots along the line 2 cm apart. Mark dots 2 cm apart along the opposite edge at the bottom of the paper. Draw lines from the top dots to the bottom dots.
(Pic 4)
Start at the bottom and cut along the lines stopping when you get to the first line.
(Pic 5)
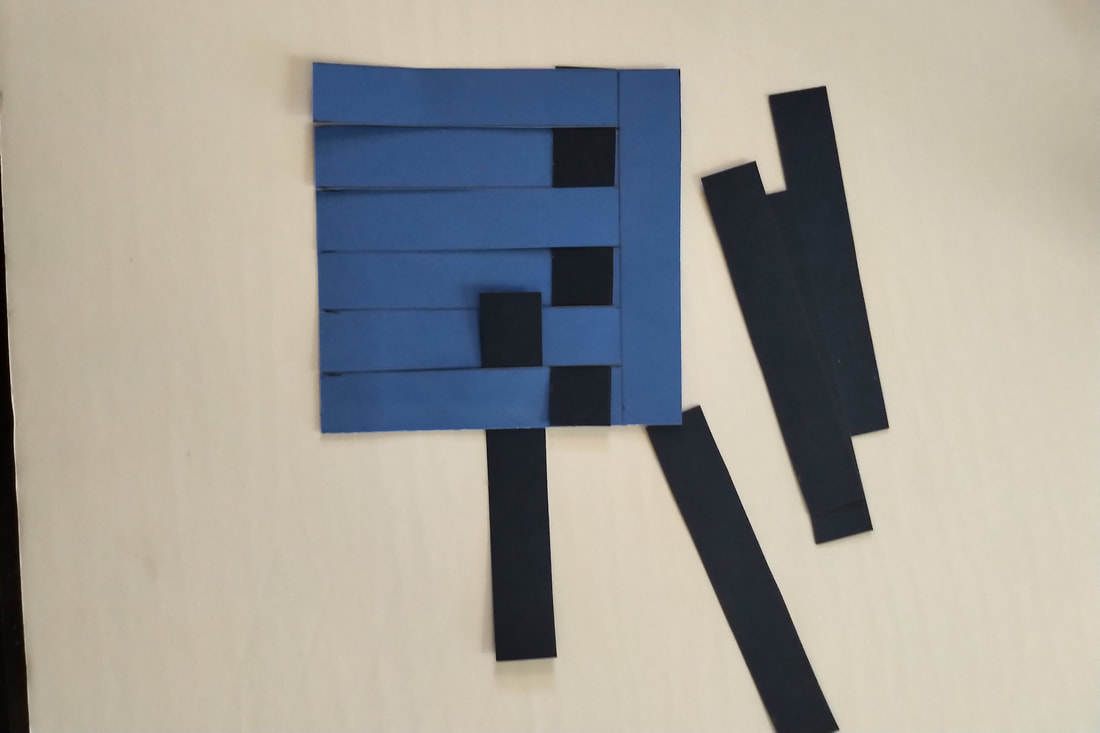
Next, take the strips and weave them across the second paper putting them over and under.
(Pic 6)
Continue by going over and under in opposite rows until you get to the bottom. (You will have strips left over.)
(Pic 7)
Tape the edges down on the back side. Trim the edges.
(Pic 8)
2 sheets of different coloured paper
ruler, tape, pencil
Step 1: Cut the paper to form squares 12 cm by 12 cm.
(Pic 1)
Mark dots every 2 cm along opposite edges of one paper.
(Pic 2)
Cut along the lines making strips.
(Pic 3)
On the second paper, draw a line across the paper 2 cm from the edge. Then mark dots along the line 2 cm apart. Mark dots 2 cm apart along the opposite edge at the bottom of the paper. Draw lines from the top dots to the bottom dots.
(Pic 4)
Start at the bottom and cut along the lines stopping when you get to the first line.
(Pic 5)
Next, take the strips and weave them across the second paper putting them over and under.
(Pic 6)
Continue by going over and under in opposite rows until you get to the bottom. (You will have strips left over.)
(Pic 7)
Tape the edges down on the back side. Trim the edges.
(Pic 8)
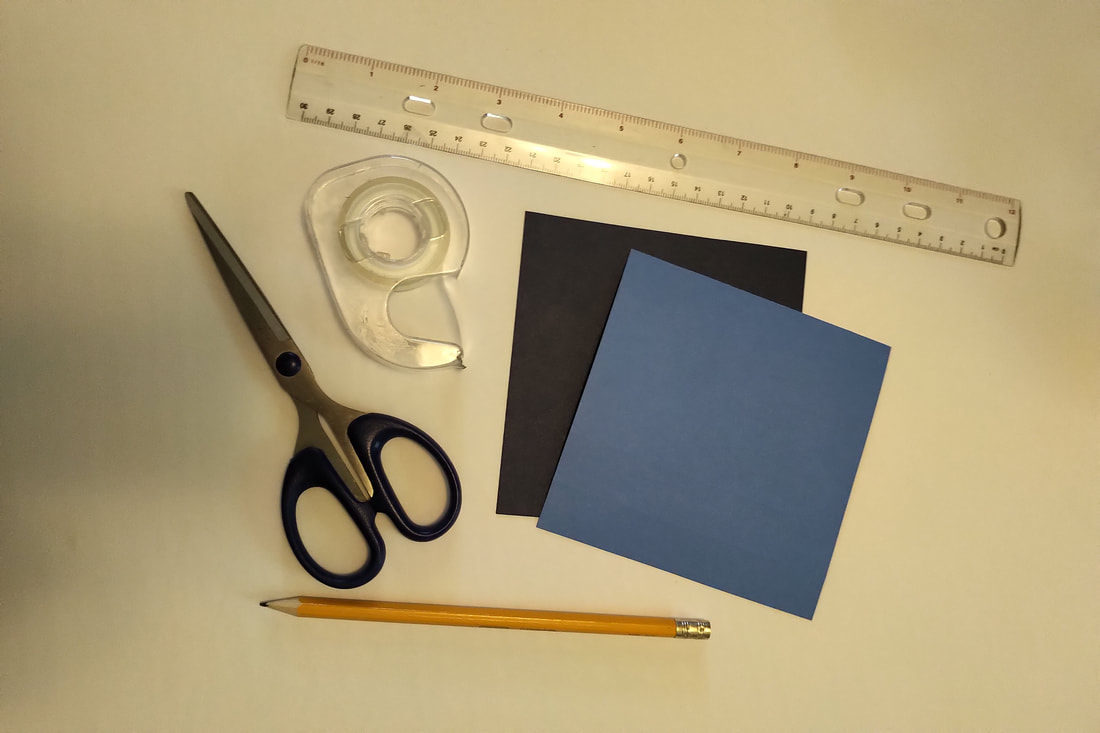
materials needed
|
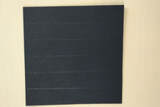
mark dots every 2cm on opposite sides
|
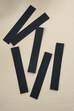
draw lines connecting the dots, side to side, then cut along lines to make strips
|
draw a line 2 cm from the edge and mark dots 2 cm apart along the line, next draw dots 2 cm apart on the other end and draw lines from the dots to the dots opposite
|
cut along the lines, leaving the space at the top attached
|
begin to weave the strips into the attached strips , alternating them over and under
|
continue until all the loose strips that fit have been added
|
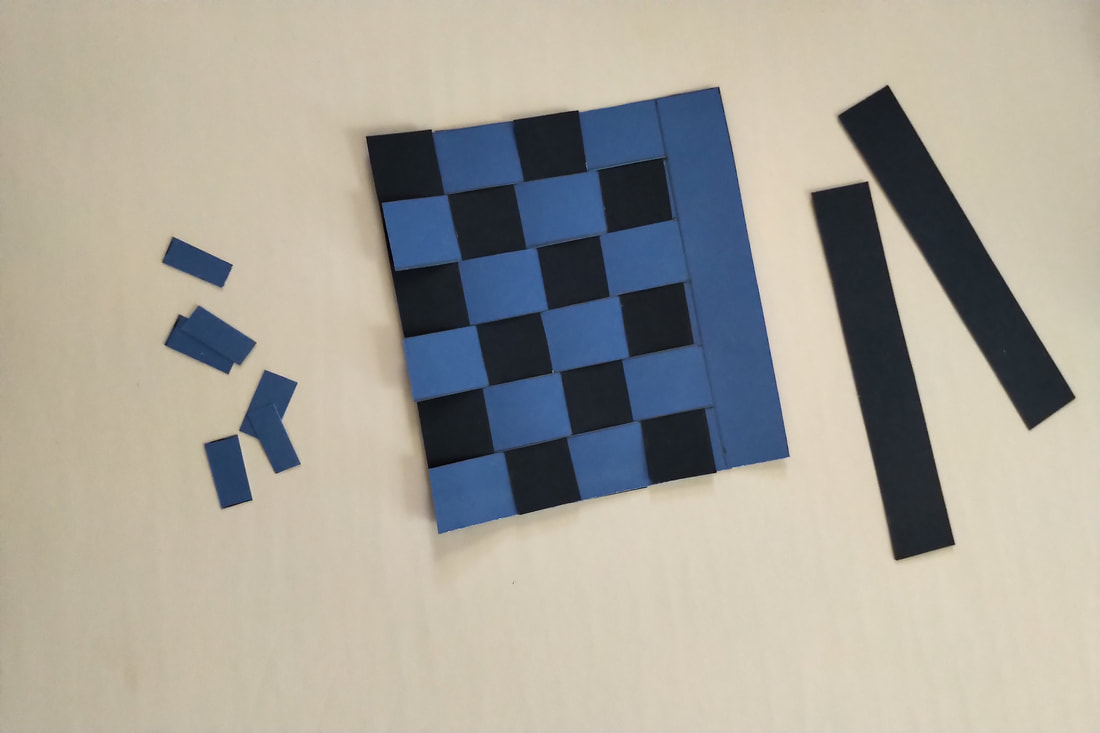
trim the ends so you have a completed square shape
|
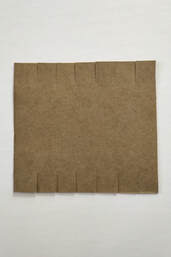
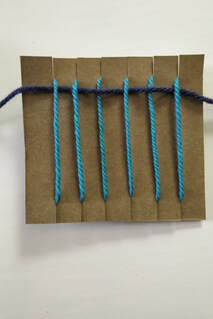
Yarn weaving
You will need:
cardboard (from recycling bin)
2 coloured balls of yarn
tape
cardboard (from recycling bin)
2 coloured balls of yarn
tape
Cut a piece of cardboard into a square (any size) and cut 1 cm notches along two opposite sides.
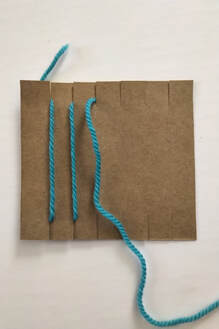
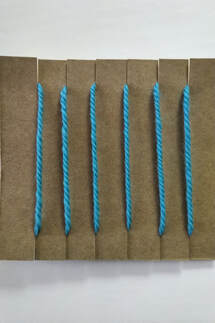
Take one piece of yarn and begin by sliding it through the first notch on one side. Pull it down to the notch directly below and slide it through. Pull the yarn through the notch directly beside and then back up to the notch directly above. Continue this until all the notches have yarn through them. Tape the loose ends to the back to secure them.
|
|
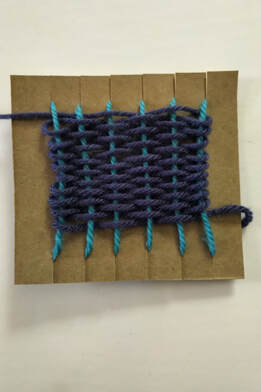
Take the second colour of yarn and begin to thread it under under the first string of yarn in the top corner. Thread it over and under the strings across the top. At the end of this row, turn directions and begin to thread it back to the other side, going over and under opposite to the pattern in the first row.
Continue threading the second yarn over and under, back and forth across the first yarn until you get to the bottom.
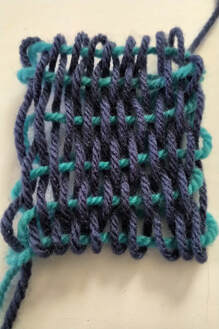
Carefully slide the ends of the first yarn off the cardboard by bending the notches down. Once your weave is off the cardboard you can tie the loose ends.
Carefully slide the ends of the first yarn off the cardboard by bending the notches down. Once your weave is off the cardboard you can tie the loose ends.
|
|
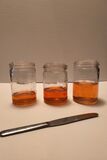
Making Sound
You will need:
3 or more jars (all the same size)
a butter knife or knitting needle
water
food colouring (optional)
Fill each jar with a different amount of water. Add food coloring if you wish. Take the knife or knitting needle and tap the top edge of each jar. Listen for the difference in the sounds.
3 or more jars (all the same size)
a butter knife or knitting needle
water
food colouring (optional)
Fill each jar with a different amount of water. Add food coloring if you wish. Take the knife or knitting needle and tap the top edge of each jar. Listen for the difference in the sounds.
Compass
*Adult assistance required.
You will need:
square of paper
marker
cork
needle
nail
lid (mayonnaise jar lid works well)
serrated knife or small saw
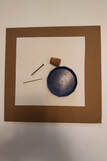
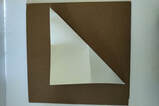
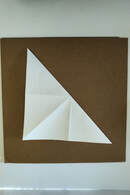
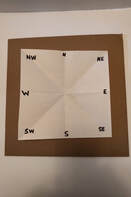
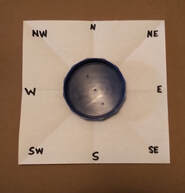
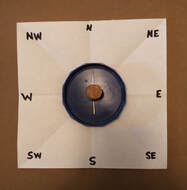
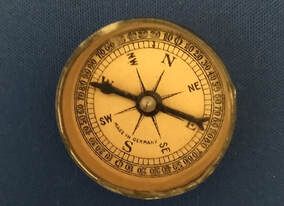
Fold the paper in half. Fold paper in half again. Unfold paper and fold from corner to corner to form a triangle. Unfold and fold corner to corner in opposite direction to form a triangle again. Unfold and mark each fold with cardinal direction labels (see picture). Place jar lid in the middle of the paper. Rub needle along nail about 20 times to magnetize it. Slice through the end of the cork with a knife (remember to make sure an adult is helping you). Push the needle through the cork horizontally. Put water in the lid and float the cork and needle. The needle should point north. Adjust the paper to line up the end of the needle with the north label. You have a compass. Ships and airplanes use complicated tools to navigate around the world. Settlers had to use a simple compass.
You will need:
square of paper
marker
cork
needle
nail
lid (mayonnaise jar lid works well)
serrated knife or small saw
Fold the paper in half. Fold paper in half again. Unfold paper and fold from corner to corner to form a triangle. Unfold and fold corner to corner in opposite direction to form a triangle again. Unfold and mark each fold with cardinal direction labels (see picture). Place jar lid in the middle of the paper. Rub needle along nail about 20 times to magnetize it. Slice through the end of the cork with a knife (remember to make sure an adult is helping you). Push the needle through the cork horizontally. Put water in the lid and float the cork and needle. The needle should point north. Adjust the paper to line up the end of the needle with the north label. You have a compass. Ships and airplanes use complicated tools to navigate around the world. Settlers had to use a simple compass.
|
|
|
|
|
|
|
|
|
Antique Boxes
You will need:
a box with a lid (like a shoebox)
thin cardboard (like from a cereal box)
a piece of string, any length
tinfoil (enough to cover the box)
black tempera type paint
white glue, a cloth, a Qtip, scissors
Cut the thin cardboard into different shapes. Glue the shapes and string onto the top and sides of the box. You can make a pattern or randomly arrange the shapes. Press a sheet of tinfoil over the top of the shapes. Cover the entire surface of the box with tinfoil. Trim around the edges. Use a Qtip to gently press down on the tinfoil around each shape. Cover the tinfoil with a thin layer of black paint. After a few minutes, use the cloth to wipe off some of the paint to create an antique look. Allow the paint to dry. You can paint the inside of the box if you wish.
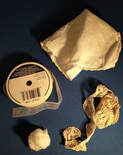
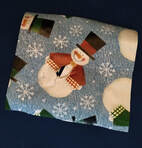
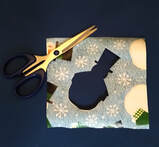
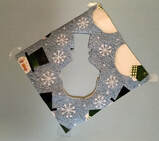
Handkerchief Sachets
You will need:
handkerchief or scrap of fabric (10 in x 10 in) or
(27 cm x 27 cm)
twine, raffia or ribbon
bowl, spoon or scoop
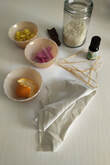
dried flower petals (about a half cup)
rice (about one cup)
orange peel
essential oil
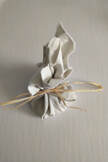
Combine the rice with dried flowers and peel. Add a few drops of essential oil. Stir to blend the mixture. Lay the material flat and spoon a small heap of the rice mixture in the centre of the fabric. Pull the corners of the material together to meet and tie the twine around the gathered fabric.
Measurements of all items can be varied.
Alternate items for different scent combinations include: dried herbs, cinnamon, cloves, dried coffee grounds, cacao, dried tea leaves, eucalyptus, cedar, pine needles, juniper
handkerchief or scrap of fabric (10 in x 10 in) or
(27 cm x 27 cm)
twine, raffia or ribbon
bowl, spoon or scoop
dried flower petals (about a half cup)
rice (about one cup)
orange peel
essential oil
Combine the rice with dried flowers and peel. Add a few drops of essential oil. Stir to blend the mixture. Lay the material flat and spoon a small heap of the rice mixture in the centre of the fabric. Pull the corners of the material together to meet and tie the twine around the gathered fabric.
Measurements of all items can be varied.
Alternate items for different scent combinations include: dried herbs, cinnamon, cloves, dried coffee grounds, cacao, dried tea leaves, eucalyptus, cedar, pine needles, juniper
|
|
|
Old Fashioned Brooch
You will need:
thick cardboard (cut into a circle, 2 inch diameter suggested)
thin cardboard strip ( 1 1/2 inch length)
paper, any colour, cut in thin strips
safety pin
white glue
Mod Podge or homemade podge (1 cup white glue, 1/3 cup water)
paint brush
coloured yarn
beads, pebbles (optional)
wax paper to protect working surface
damp cloth for spills
plastic lid
Put thin cardboard strip through closed safety pin and glue the strip to the back of the thick cardboard circle. Make sure the side of the pin that opens is on top. Cover the other side of the circle with layers of the strips of paper using the podge mixture to secure them. Let the podge dry. Pour some glue on the plastic lid. Drag pieces of yarn through the glue. Place the yarn on the circle in spiral and zigzag designs. Add different colours of yarn. Add beads or tiny pebbles. Let the glue dry. Cover the yarn and beads with podge. Allow to dry thoroughly.
Variation:
Coat of Arms
Cut the thick cardboard in the shape of a shield. Follow above steps to secure the pin on the back. Use string to create a design for a coat of arms or use coloured markers to draw the design.
|
|
Paddle Steamer
You will need:
poster board (about 4 in by 6 in)
elastic
cardboard (1 in by 3 in)
paper roll (optional)
small box (optional)
Cut a rectangle (about 1 in by 4 in) from one end of the poster board. Stretch the elastic from one end of the board to the other end across the rectangular opening. Glue the paper roll and box to the top of the board as the smoke stack and cabin, if you wish. Place the small cardboard strip between the elastic and twist a few times. Place in water and release the cardboard strip. This will propel the boat forward. You may need to replace the cardboard strip as it gets wet.
|
|
|
Handkerchief Doll
You will need:
a handkerchief or similar sized piece of fabric
cotton ball
ribbon
scrap of lace (optional)
Lay the handkerchief out flat on a surface. Tie a knot at one top corner. Tie a knot at the other top corner. Tuck cotton into the middle of the top of the handkerchief to form a head shape. Wrap a ribbon around the base of the head shape and tie it in front. Add lace to the top of the head if you wish.
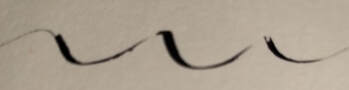
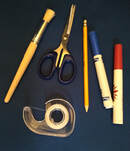
Fancy Penmanship: Calligraphy
Penmanship was taught as an art form and the ability to write with flair was highly regarded in settler's days. Make a pen and try your hand at calligraphy. You can start with poster paint to practice. Calligraphy letters have thin lines going upwards and thick lines going downwards.
You will need:
paper
reed (5 or 6 inches)
poster paint
scissors, paper towel
Trim one end of the reed by cutting a curve about one centimetre long on each side to create a flat, rounded point called a nib. Cut a slit (about one centimetre long) in the end of the nib heading toward the centre. Dip the end of the nib gently into the paint. Have paper towel ready to make some lines on to take off the extra paint before using it on your paper. Practice drawing some lines upwards and downwards. Apply very light pressure upwards to make the line thinner and more pressure when going downwards to make the line thicker. Now try drawing some letters using these strokes.
Alternative: you can use a feather and cut the tip on an angle
|
|
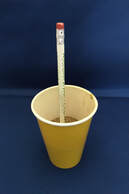
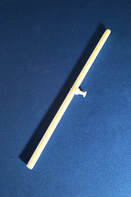
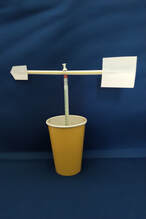
Wind Vane
The captains of ships needed to pay close attention to wind speed and direction so they could steer the boats from Scotland or Ireland to Canada in the 1800's. They had some instruments to help them measure this information. You can see wind direction with a wind vane.
You will need:
drinking straw
push pin
cardboard cut in a circle (approx: 4 inches by 4 inches)
paper
cup
sand
pencil with an eraser on the end
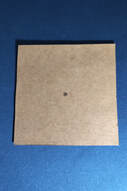
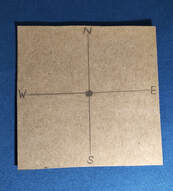
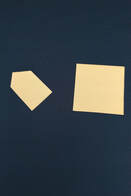
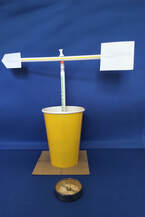
Mark the centre of the cardboard circle with a dot. Draw two lines on the cardboard circle through the centre of the dot to form a cross. Mark the cardinal directions on the ends of these lines (N, S, E, W). Fill the cup half full of sand. Stand the pencil in the sand with the eraser end up. Take the push pin and push it through the midpoint of the straw. Cut an arrow and a square from the paper (approx: 2 inches by 2 inches) Attach the arrow to one end of the straw and the square to the other end. You could tape these in place or cut small slits and slide them over the ends of the straw. Push the pin into the eraser. Make sure the straw can turn easily. You don't want it too loose, but it should be able to turn freely when you blow on it. Place the cup on the cardboard circle. Put your wind vane outside where the wind will catch it. Use a compass to place the N on the circle in the direction of North. You will be able to read the direction of the wind. See if the direction changes at different times of day and on different days. Keep a record of the wind direction for a week.
You will need:
drinking straw
push pin
cardboard cut in a circle (approx: 4 inches by 4 inches)
paper
cup
sand
pencil with an eraser on the end
Mark the centre of the cardboard circle with a dot. Draw two lines on the cardboard circle through the centre of the dot to form a cross. Mark the cardinal directions on the ends of these lines (N, S, E, W). Fill the cup half full of sand. Stand the pencil in the sand with the eraser end up. Take the push pin and push it through the midpoint of the straw. Cut an arrow and a square from the paper (approx: 2 inches by 2 inches) Attach the arrow to one end of the straw and the square to the other end. You could tape these in place or cut small slits and slide them over the ends of the straw. Push the pin into the eraser. Make sure the straw can turn easily. You don't want it too loose, but it should be able to turn freely when you blow on it. Place the cup on the cardboard circle. Put your wind vane outside where the wind will catch it. Use a compass to place the N on the circle in the direction of North. You will be able to read the direction of the wind. See if the direction changes at different times of day and on different days. Keep a record of the wind direction for a week.
|
|
|
|
|
|
|
|
|
Plaited Bracelet
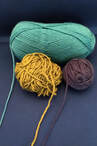
Settler children did lots of hand crafts. Today, we often make bracelets to give to our friends as gifts. Ask your parents or grandparents if they have any spare yarn you can use to make some bracelets. Plaiting (pronounced: pletting) is similar to braiding. You take 3 strands of yarn or string tied together at the top and cross the left strand over the middle. Then take the right strand and cross over the middle. Repeat this pattern until the end of the string.
You will need:
3 different balls of yarn
scissors
Cut 3 lengths of each colour of yarn about 1 foot long. Cut a shorter length (about 3 inches) of each colour. Gather all the strands of each colour together and tie the ends with the shorter length of yarn in the same colour. Plait the three different colours together. Fasten the ends together to make a bracelet.
Sailing Ships
You will need:
a magnet
straight pins
plastic tray or lid (with edges)
poster board or cork board (1/4 inch thickness)
scissors, paper, tongs, wooden skewers
two plastic bins or stacks of books (for elevation of tray)
iron, to trace (optional)
Cut a boat from the poster board or cork in the shape of the bottom of an iron. Push the three straight pins horizontally into the flat end of the boat shape. Cut the wooden skewers into short lengths. Stick these skewers into the top of the foam or cork boat to form a mast. Attach small paper sails to the skewers with tape or by making a slit. Invert the plastic bins and place them about a foot apart. Place the tray on the edges of the bins to form a bridge. Pour a small amount of water onto the surface of the tray. Place the boat in the water on the tray. Use the tongs to hold the magnet under the tray between the two bins. When the magnet is directly under the boat, the pins will be attracted to the magnet and begin moving as the magnet does. Place some small rocks on the tray to provide obstacles for the boat and try to navigate around them.
Hour Glass
You will need:
2 bottles (any size)
fine white sand or salt (dried in the sun or an oven)
metal washer with small opening
glue
funnel (optional)
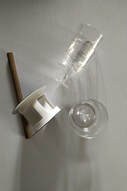
Make sure that the bottles and sand or salt are completely dry. Use a funnel to add sand or salt one bottle. More sand will make the time longer and less will make the time shorter. Glue the washer to the rim of the top of one bottle. To gauge the time, you could do a practice run with your hour glass by inverting the second bottle and holding it together with your hand so that the two openings are touching. You can adjust the amount of sand or salt to get the time you desire. Then when this is accomplished, you can glue the inverted second bottle to the washer. To test the accuracy of your hour glass, record the time it takes for the sand or salt to move from one bottle to the other completely. Repeat this several times and compare the results to judge how consistent your time piece is at measuring time.
2 bottles (any size)
fine white sand or salt (dried in the sun or an oven)
metal washer with small opening
glue
funnel (optional)
Make sure that the bottles and sand or salt are completely dry. Use a funnel to add sand or salt one bottle. More sand will make the time longer and less will make the time shorter. Glue the washer to the rim of the top of one bottle. To gauge the time, you could do a practice run with your hour glass by inverting the second bottle and holding it together with your hand so that the two openings are touching. You can adjust the amount of sand or salt to get the time you desire. Then when this is accomplished, you can glue the inverted second bottle to the washer. To test the accuracy of your hour glass, record the time it takes for the sand or salt to move from one bottle to the other completely. Repeat this several times and compare the results to judge how consistent your time piece is at measuring time.
Lighthouse
Re-creating the lighthouse on Isle Verte
You will need:
tall paper cup
jar lid (slightly larger diameter than top of cup)
4 wooden skewers (cut to about 2 inches in length)
small funnel or paper cone (preferably red)
2 toothpicks
tealight
glue, plasticine, marker, white paper or white paint (optional)
You may want to research the lighthouse of Isle Verte to get inspiration.
Place the cup with the open end down. Put the jar lid under the cup with the open part down. This forms the base. You can paint your cup or cover it with white paper. Draw three windows vertically down the side of the cup. Put tealight on top of cup. Poke the skewers into the top of the cup or secure them with a small bit of plasticine as a base for each one. Place them at even intervals. They form the base for the top part. Place the inverted funnel or cone on top of the skewers. A dab of glue will secure the funnel or cone to the skewers. Create a wind vane to decorate the top by gluing the toothpicks in the form of a cross. Poke one end into a bit of plasticine on top of the funnel or cone. Glue a tiny arrow head and tail on the horizontal toothpick to form a wind vane.
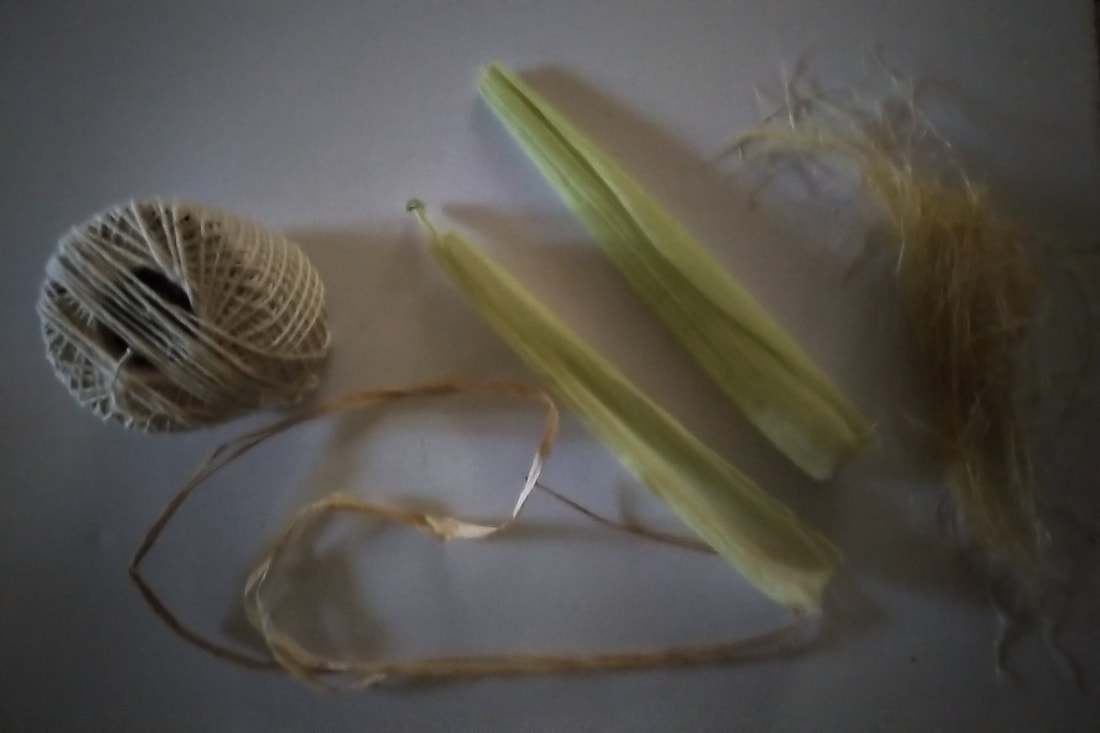
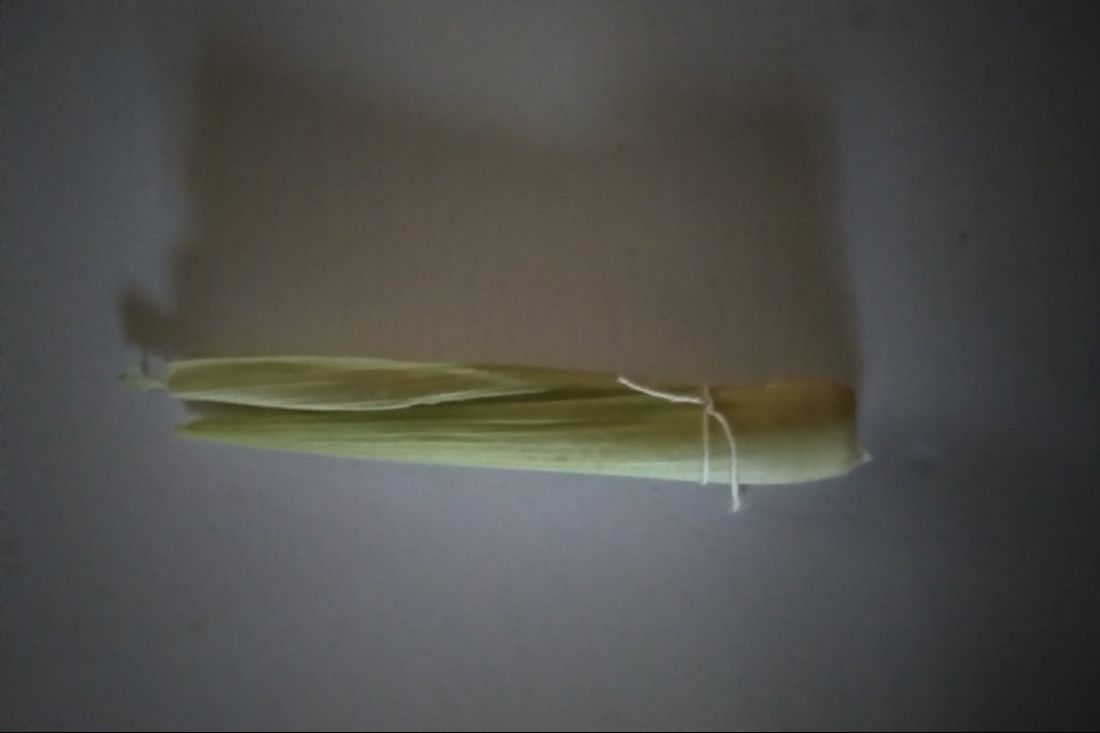
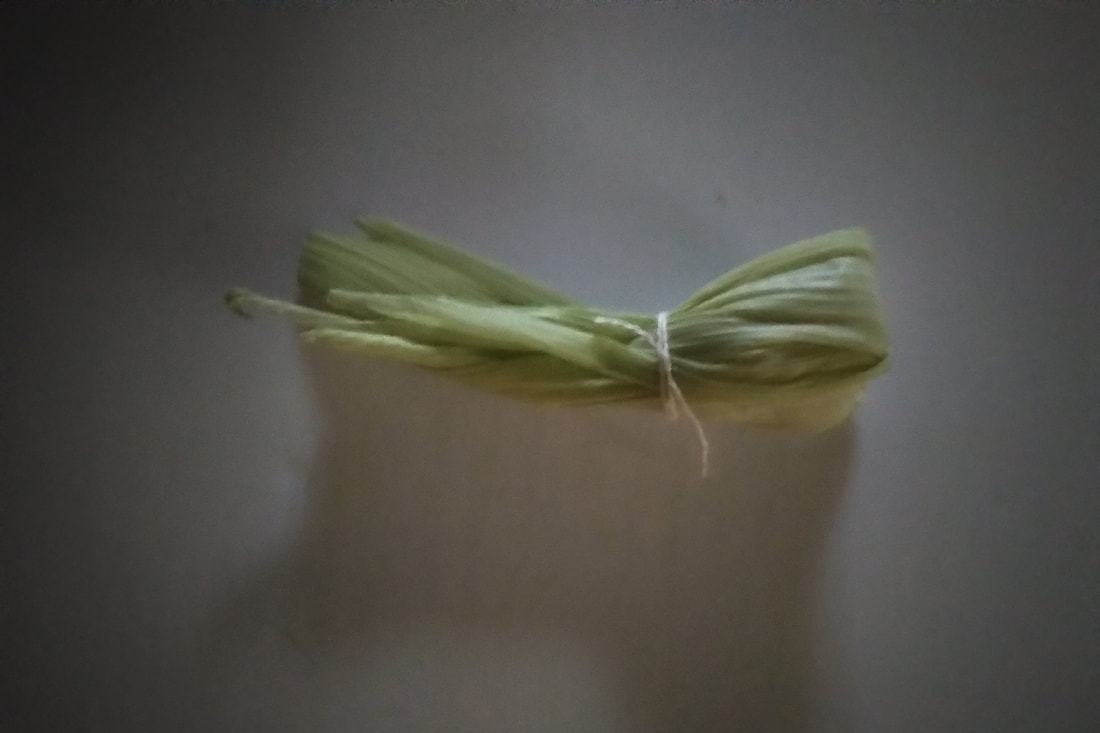
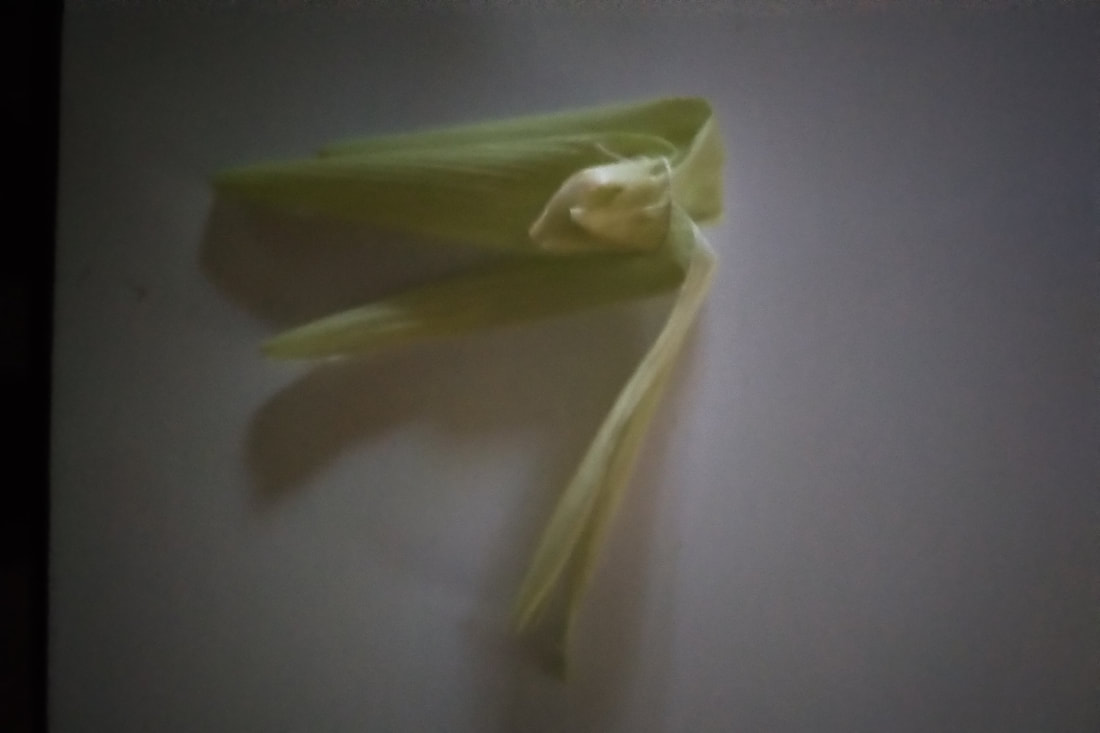
Corn Husk Doll
First Nations people relied on corn as a staple of their diet. It was easy to grow and harvest. They used the husks to weave baskets, mats and rope. The children made corn husk dolls.
You will need:
corn husks and silk
string or raffia
glue
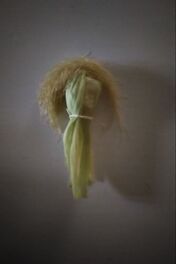
Gather four or more individual husks and line up the larger parts together at the base. Tie a string about an inch from the end of the base. Carefully, pull the husks back over the string to form a ball. This becomes the head. Tie another piece of string just below the ball to become the neck. Take another husk and lie it flat. Roll it to form a tube. Tie a string at each end to form hands. This husk will be the arms. Tuck the arms into the body of the doll below the neck. Tie another string around the body to secure the arms. This is the waist. The bottom of the husks become the dress. Variation: to make pants, separate the husks equally and tie string at the bottom of each part. This forms ankles and feet. To add hair, gather the silk of the corn together. Glue can be used to attach the silk to the top of the head.
You will need:
corn husks and silk
string or raffia
glue
Gather four or more individual husks and line up the larger parts together at the base. Tie a string about an inch from the end of the base. Carefully, pull the husks back over the string to form a ball. This becomes the head. Tie another piece of string just below the ball to become the neck. Take another husk and lie it flat. Roll it to form a tube. Tie a string at each end to form hands. This husk will be the arms. Tuck the arms into the body of the doll below the neck. Tie another string around the body to secure the arms. This is the waist. The bottom of the husks become the dress. Variation: to make pants, separate the husks equally and tie string at the bottom of each part. This forms ankles and feet. To add hair, gather the silk of the corn together. Glue can be used to attach the silk to the top of the head.
|
|
|
|
Waterwheel
You will need:
a plastic spool used to hold ribbon
6 plastic glasses or small containers
wooden dowel
glue
2 margarine tub lids (optional), nail
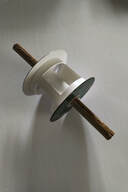
Glue the bottoms of the glasses around the edges of the spool. The number will vary with the size of the glasses and spool. Glue them all around the part of the spool that would hold the ribbon. Put the dowel through the center hole of the spool. If the hole is too large and the dowel slips, pierce a hole the size of the dowel's diameter in the center of a margarine tub with a nail. Glue this to the outside of the spool. Repeat this for the other side. Push the dowel through the holes in the lids. This will help hold the dowel in place as it goes through the spool. Pour water on top of the glasses and it will spill out and turn the spool as a water wheel turns.
a plastic spool used to hold ribbon
6 plastic glasses or small containers
wooden dowel
glue
2 margarine tub lids (optional), nail
Glue the bottoms of the glasses around the edges of the spool. The number will vary with the size of the glasses and spool. Glue them all around the part of the spool that would hold the ribbon. Put the dowel through the center hole of the spool. If the hole is too large and the dowel slips, pierce a hole the size of the dowel's diameter in the center of a margarine tub with a nail. Glue this to the outside of the spool. Repeat this for the other side. Push the dowel through the holes in the lids. This will help hold the dowel in place as it goes through the spool. Pour water on top of the glasses and it will spill out and turn the spool as a water wheel turns.
|
|
|
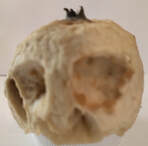
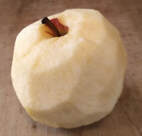
Apple Head Doll
You will need:
1 apple
1 cup lemon juice
1 tablespoon salt
wire (twist tie, floral wire or pipe cleaner)
2 wooden dowels
scrap material
raffia or twine
small bowl, apple peeler, knife
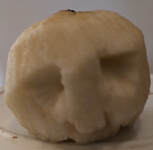
Peel the apple. Use the end of the peeler or knife to remove the stem and core to about 1/2 inch from the bottom of the apple. Make sure the hollow where the core is removed is not bigger than the dowel. Invert the apple so that the hollowed out end is on the bottom. Carve eyes, nose and mouth in apple flesh. Soak the apple in lemon juice and salt mixture for about 1/2 hour in a bowl. Remove the apple from the liquid and place it on a baking tray. Leave the apple in a 100 degree F oven for 1 - 2 hours. Let the apple cool and set aside to dry naturally for several days. Check your apple each day to see how it is shrinking. When the apple has shrunken to the shape you like, place the apple on the wooden dowel. The second dowel can be attached about 2 inches from the top of the first dowel at a right angle using the wire. This will form the arms. Use material as clothing to cover the dowels. Use raffia to secure the fabric on the dowels.
1 apple
1 cup lemon juice
1 tablespoon salt
wire (twist tie, floral wire or pipe cleaner)
2 wooden dowels
scrap material
raffia or twine
small bowl, apple peeler, knife
Peel the apple. Use the end of the peeler or knife to remove the stem and core to about 1/2 inch from the bottom of the apple. Make sure the hollow where the core is removed is not bigger than the dowel. Invert the apple so that the hollowed out end is on the bottom. Carve eyes, nose and mouth in apple flesh. Soak the apple in lemon juice and salt mixture for about 1/2 hour in a bowl. Remove the apple from the liquid and place it on a baking tray. Leave the apple in a 100 degree F oven for 1 - 2 hours. Let the apple cool and set aside to dry naturally for several days. Check your apple each day to see how it is shrinking. When the apple has shrunken to the shape you like, place the apple on the wooden dowel. The second dowel can be attached about 2 inches from the top of the first dowel at a right angle using the wire. This will form the arms. Use material as clothing to cover the dowels. Use raffia to secure the fabric on the dowels.
|
|
Measuring Tools
Settlers' lots were measured by chain links. Items can be linked together to make a measuring tool.
You will need:
10 or more items that link together (must all be exactly the same)
ideas: paperclips, plastic chain links, bread clips, curtain hooks
Link your items together and make a chain. Find 5 - 10 items and measure the length of each.
Record your measurements in a chart.
For more measuring activities go to Measuring Activities for Kids by MTI
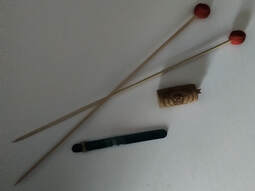
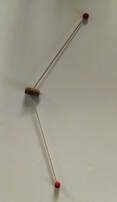
Balancing Toy
You will need:
2 wooden skewers
plasticine
1 elastic (small)
1 popsicle stick
2 yards of fishing line (approximately)
1 cork
Divide the plasticine into 2 equal parts. Roll each part into a round ball. Insert one skewer into each plasticine ball. Set aside. Take the popsicle stick and saw 1/2 inch off the end. Make a 'V' shaped notch in the end of this small piece. Insert the flat side of this piece into a slit in one end of the cork. Set aside. Wind the fishing line carefully around the middle of the remainder of the popsicle stick. Use a small elastic to keep the line in place when not in use. Insert the wooden skewers in opposite sides of the cork about half way up the sides. Unwind the fishing line partially and have a friend hold the end of it and move several steps away until the line is tight. Carefully, place the bottom of the cork with the notch in it on the line. The toy will travel from one end of the line to the other. By raising the other end, the toy will travel back to the starting place. Practice travelling from one end to the other to find the best angle of the line to ensure balance.
Borrowed from: Joanne Little
|

|
|
Pumpkin Seed Art
You will need:
pumpkin seeds (from a pumpkin or buy at a grocery store.)
food colouring
zip lock bags (small)
wax paper, tray
*Note: bowls and spoons can be used instead of bags
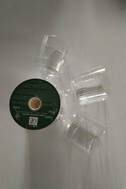
Decide what colours of seeds you would like to use and prepare on bag or bowl for each. Add a desired amount of seeds to the bag. Add several drops of colouring to the bag. Close the bag securely. Shake the seeds and colouring together until the seeds are coated. Take the seeds out and spread them on wax paper on a tray. Allow the seeds to dry thoroughly. Repeat this process for each colour of seed you want to use for your art project. Once the seeds are dry, they can be used for several projects.
Suggested art projects for coloured pumpkin seeds:
1. Find a small branch that will lie flat on a paper. Glue the seeds to the twigs on the branch.
2. Find a pine cone and stick the seeds into the spaces on one side to create a colourful porcupine. Glue the seeds in place to make them more secure if you wish.
3. Make a flower design on a paper by gluing the seeds in a petal pattern. Draw a stem and leaves to complete your picture.
pumpkin seeds (from a pumpkin or buy at a grocery store.)
food colouring
zip lock bags (small)
wax paper, tray
*Note: bowls and spoons can be used instead of bags
Decide what colours of seeds you would like to use and prepare on bag or bowl for each. Add a desired amount of seeds to the bag. Add several drops of colouring to the bag. Close the bag securely. Shake the seeds and colouring together until the seeds are coated. Take the seeds out and spread them on wax paper on a tray. Allow the seeds to dry thoroughly. Repeat this process for each colour of seed you want to use for your art project. Once the seeds are dry, they can be used for several projects.
Suggested art projects for coloured pumpkin seeds:
1. Find a small branch that will lie flat on a paper. Glue the seeds to the twigs on the branch.
2. Find a pine cone and stick the seeds into the spaces on one side to create a colourful porcupine. Glue the seeds in place to make them more secure if you wish.
3. Make a flower design on a paper by gluing the seeds in a petal pattern. Draw a stem and leaves to complete your picture.
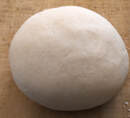
Homemade Clay
You will need:
4 cups flour
1 1/2 cups salt
1 1/2 cups water
bowl, spoon, pastry board
Mix flour and salt. Add water gradually while stirring. Place on a pastry board (or flat surface) and knead until well blended. Form into a ball. Store clay in an airtight container until ready to use. Clay can be used to create shapes or figures. Use a cookie cutter if you wish.
To harden the clay, leave exposed to air for several days. The hardening process may be sped up by placing clay on a tray in a low (100 degree F) temperature oven for a few hours. Clay may be painted after it has fully hardened.
Apple Slice Prints
You will need:
a few apples
paint
paint brush (optional), or plate
paper
knife *(adult supervision may be required)
wax paper (to put slices on after print is made)
Cut the apples in half. Cut the halves in half again. If you want slim prints, cut the slices in half again. Cover one side of the apple slice with paint. You can use a paintbrush to apply or dip the side into paint that is spread out on a plate. Carefully, place the painted side of the apple slice onto the paper. Press firmly and then lift the slice off the paper. Continue with this process until you have a picture you like.
You can change the colour of paint by using another slice of apple.
To make a flower, make a small circle of paint on the paper and then arrange the prints of the apple slices around the circle to make petals.
Picture Frames
You will need:
sheet of paper
twigs
pruning shears
twine
Draw or paint a picture on your paper. Measure the sides of the paper. Cut two twigs the same length, plus two inches, as the long sides of the paper. Cut two twigs the same length, plus two inches, as the shorter sides of the paper. Lay the twigs out on top of the paper along the edges to create a rectangle. The ends should overlap and go past the paper. Fasten the corners of the twigs together where they overlap about two inches in from the ends to form a frame. Fasten your paper to the frame with tape or glue.
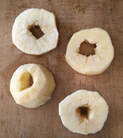
Dried Apple Ring Strings
You will need:
peeled apples
knife
twine or string
Remove the core from the peeled apples. Slice the apples crosswise (horizontally) to create rings. Set these aside on a tray to dry for a few days. When dried, string the slices on the twine to create a garland.
peeled apples
knife
twine or string
Remove the core from the peeled apples. Slice the apples crosswise (horizontally) to create rings. Set these aside on a tray to dry for a few days. When dried, string the slices on the twine to create a garland.
|
|
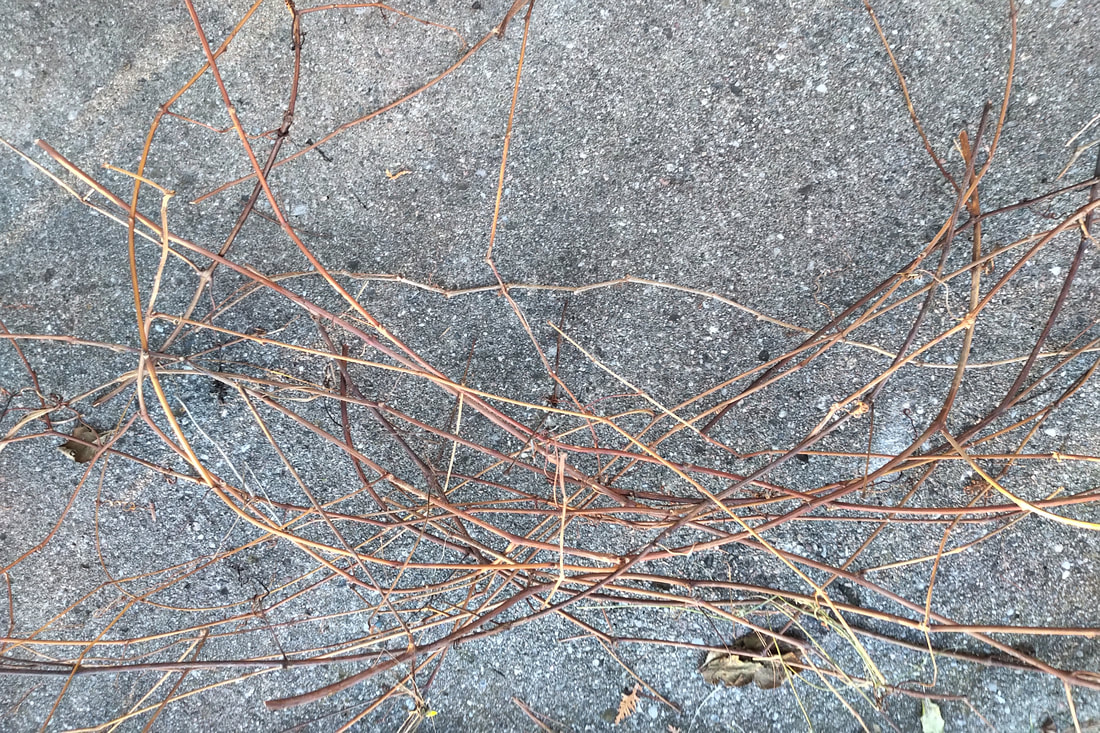
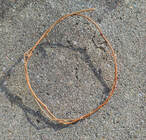
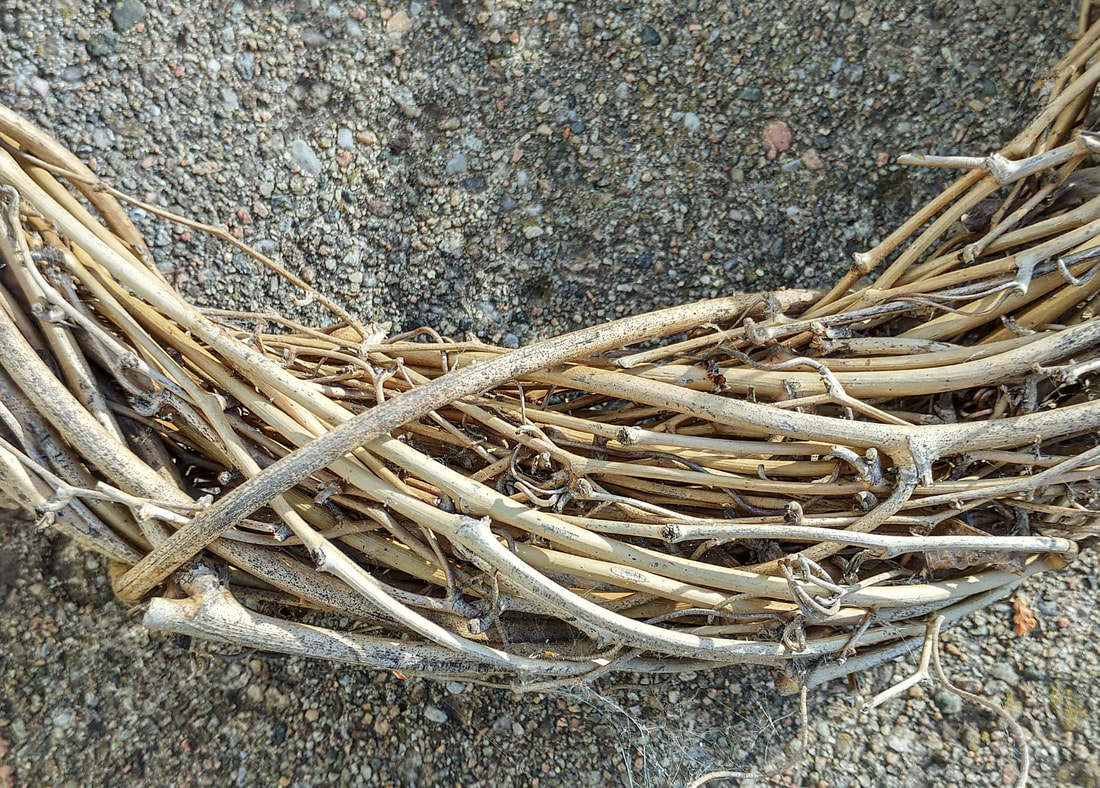
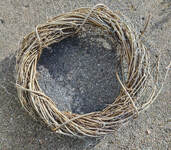
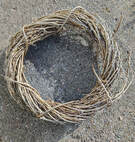
Vine Wreath
You will need:
vines
floral wire (optional) or twist ties
If the vines are brittle, soak them in a pail of water to soften them and make them pliable (able to bend easily). Start with a length of vine and form it into a circle with some overlap. This is your base. Twist the overlap through the vine that forms your circle (like the first step in tying a shoelace). Add more vine by continuing to wind it around the circle. Continue to wrap more layers of vine around the base until you reach the size of wreath you wish to create. Secure it with wire, if needed. Other natural items can be added to your wreath, like leaves or dried flowers.
|
|
|
|
Tie a Fishing Knot
You will need:
string, yarn or fishing line
Take a length of string or fishing line. Put the ends together. Tie a loop as you would in the first step of tying a shoelace. Pull the knot until you have a small loop (about an inch). Put the ends through the loop and repeat the first step. Pull the knot tight.
Check out more knots at: more knots
Soap Making
*Adult assistance needed.
Scented Soap
You will need:
8 ounces of soap base
heat proof bowl
double boiler (optional)
3/4 teaspoon fragrant oil
1 drop colour (optional)
plastic mold
Cut the soap base into chunks. Melt the soap base in a microwave at short intervals, checking often (or double boiler, stirring). Stir in the fragrance and colour. Pour into molds and allow to harden for about 3 to 4 hours.
From: Willow and Sage Volume 6 2020
Alternate idea:
Sage Shower Tablets
You will need:
muffin tin or plastic mold
bowl
1 cup baking soda
1/2 cup citric acid (optional)
1/4 cup cornstarch
45 drops lavender essential oil
45 drops orange essential oil
25 drops sage essential oil
spray bottle with rubbing alcohol
airtight container
Mix baking soda, citric acid and cornstarch together. Add the essential oils and mix thoroughly. Spray with rubbing alcohol to moisten and bring mixture together. When the mixture holds together, pack it into muffin tins or mold. To remove, turn over and tap the tin or mold to loosen the tablet.
Essential oils can be substituted with other fragrances.
From: Willow and Sage. Volume 7 2020
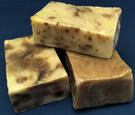
homemade soap
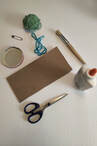
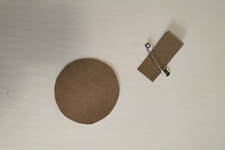
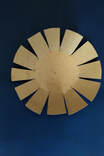
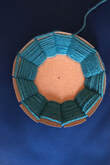
Yarn Basket (on cardboard)
You will need:
yarn
cardboard
scissors, ruler, pencil
Trace a circle on the cardboard and cut it out. Place the ruler across the circle and mark the centre point. Place the ruler across the circle in another place and mark the centre. Adjust the marks to find a centre point that is the same distance from all points around the outside edge. Lay the ruler across the circle and make a mark at the outer edges. Slide the ruler around, keeping it across the centre dot. Make marks about an inch apart all around the outside edge. Draw lines from the outside edge marks about half way to the centre. Repeat this until all outer edge marks have a line that leads toward the centre. Using scissors, cut along the lines, stopping at the end of the lines. Make the slits wider in a 'v' shape. Begin to wind the yarn from the underside of the circle through the first slit. Continue around the circle by alternating under and over through the slits. When you get around the circle twice, you will need to skip to make sure that the number of layers of yarn remain equal. Continue around the circle, increasing the tension (making tighter) as you go to pull the edges up to form the basket shape.
|
|
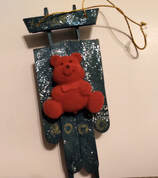
Sled Ornament
You will need:
6 popsicle sticks
paint (optional)
glue (optional)
yarn (approx. 6 inches) or string
Paint the popsicle sticks the colour of your choice. Allow the paint to dry. Glue 4 of the sticks together, side by side to form the flat seat of the sled. Turn the other popsicle sticks on their edges and glue one on each side of the underside of the seat platform to form the runners. Loop the yarn and attach the ends to the underside of the sled. This will allow you to hang up the sled ornament. You can add extra decoration as you wish.
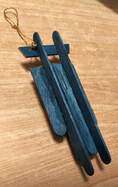
|
|
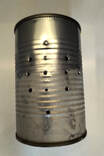
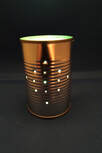
Tin Lantern
You will need:
empty tin can
nail
hammer
cloth
battery tealight
old card for pattern (optional)
Half fill tin can with water and freeze. Remove tin from freezer when water is frozen solid. Place tin on its side on top of a cloth to stabilize (hold in place) while making pattern. Tape can be used to secure can, if needed. A design on an old card or a hand drawn pattern on paper can be attached to the side of the can as a guide. Use hammer and nail to tap small holes onto tin can following the pattern. Remove pattern and thaw ice. When can is empty and dried, lower tealight into bottom of it. The light from the tealight will shine through the holes in the can. A handle made from wire could be added to the top of the tin by punching two holes near the top of the tin on opposite sides. Wire can be pushed through the holes and secured at each end. This will allow the lantern to be hung on a hook.
Variation: A tin foil plate or tray can be used instead of a can. Make a pattern using the hammer and nail as described above. This design could be hung up in a window or in front of a light.
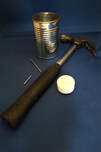
|
|
|
Artifacts from the Middleville and District Museum
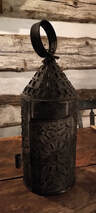
tin lantern
|

tin lantern with light inside
|
Stencils
You will need:
cardstock
greeting card or wrapping paper
scissors
markers or paint and paint brush
sheet of paper
Find a card or wrapping paper with a simple design. Cut out the shape. Tape the card or paper to a background paper. Colour or paint the area that has been cut out. When dry, carefully lift the stencil off the background paper. If adding more than one design, move the stencil to another area and repeat the process. You can even make your own wrapping paper if you use a roll blank white or brown paper.
|
|
|
|
Feather Wreath
You will need:
vine wreath
feathers (from craft store)
glue
Put a dab of glue on the sharp end of each feather and place the feathers in the spaces between the vines of the wreath. Add a piece of yarn to the top of the wreath to hang it up if desired.
vine wreath
feathers (from craft store)
glue
Put a dab of glue on the sharp end of each feather and place the feathers in the spaces between the vines of the wreath. Add a piece of yarn to the top of the wreath to hang it up if desired.
|
|
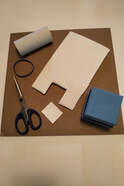
Log Cabin Quilt Pattern (paper)
You will need:
3 sheets of coloured paper:
one red (or orange) sheet
one light coloured sheet
one dark coloured sheet
ruler, pencil, scissors
glue, background paper (optional)
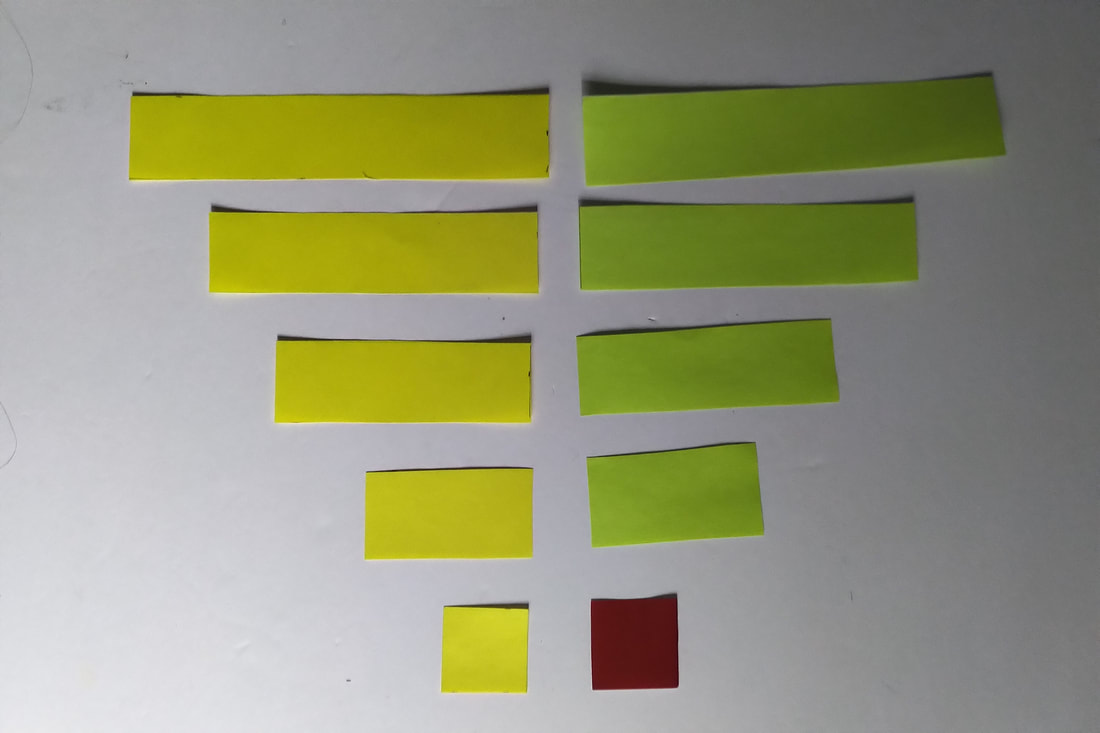
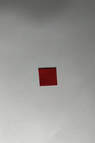
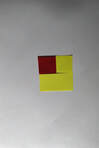
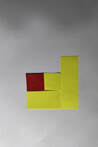
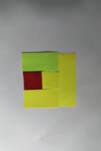
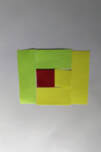
Measure and cut out a 1 by 1 inch square from the red sheet. This square will be the first part of the pattern and is red to represent the fire or hearth of the cabin. The remaining papers will be cut into strips to represent the logs. Next, measure 1 inch intervals along both the short ends of the remaining papers. Draw lines from one end to the other end at the marked intervals. Cut along these lines to create strips. Using the light strips, measure and cut one each of a 2, 3, 4 and 5 inch strip. Do the same for the dark strips.
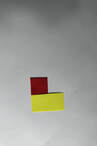
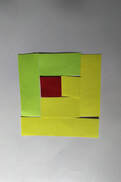
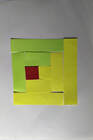
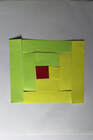
To assemble the pattern, begin with the red square. Place the 2 inch light strip under the red square, extending out to the right side. Next, place the 1 inch light strip beside the red square. Continue adding strips in a counter clockwise direction. Next, place the 2 inch dark strip across the top of the red square. Place the 3 inch dark strip on the left side of the red square. Place the 4 inch light strip across the bottom. Place the 3 inch light strip along the right side. Place the 4 inch dark strip across the top. Place the 5 inch dark strip along the left side. Place the 4 inch light strip across the bottom. Finally place the 5 inch light strip along the right side. The finished design should form a square shape. The left, top diagonal should be dark and the right, bottom diagonal should be light.
3 sheets of coloured paper:
one red (or orange) sheet
one light coloured sheet
one dark coloured sheet
ruler, pencil, scissors
glue, background paper (optional)
Measure and cut out a 1 by 1 inch square from the red sheet. This square will be the first part of the pattern and is red to represent the fire or hearth of the cabin. The remaining papers will be cut into strips to represent the logs. Next, measure 1 inch intervals along both the short ends of the remaining papers. Draw lines from one end to the other end at the marked intervals. Cut along these lines to create strips. Using the light strips, measure and cut one each of a 2, 3, 4 and 5 inch strip. Do the same for the dark strips.
To assemble the pattern, begin with the red square. Place the 2 inch light strip under the red square, extending out to the right side. Next, place the 1 inch light strip beside the red square. Continue adding strips in a counter clockwise direction. Next, place the 2 inch dark strip across the top of the red square. Place the 3 inch dark strip on the left side of the red square. Place the 4 inch light strip across the bottom. Place the 3 inch light strip along the right side. Place the 4 inch dark strip across the top. Place the 5 inch dark strip along the left side. Place the 4 inch light strip across the bottom. Finally place the 5 inch light strip along the right side. The finished design should form a square shape. The left, top diagonal should be dark and the right, bottom diagonal should be light.
|
|
|
|
|
|
|
|
|
|
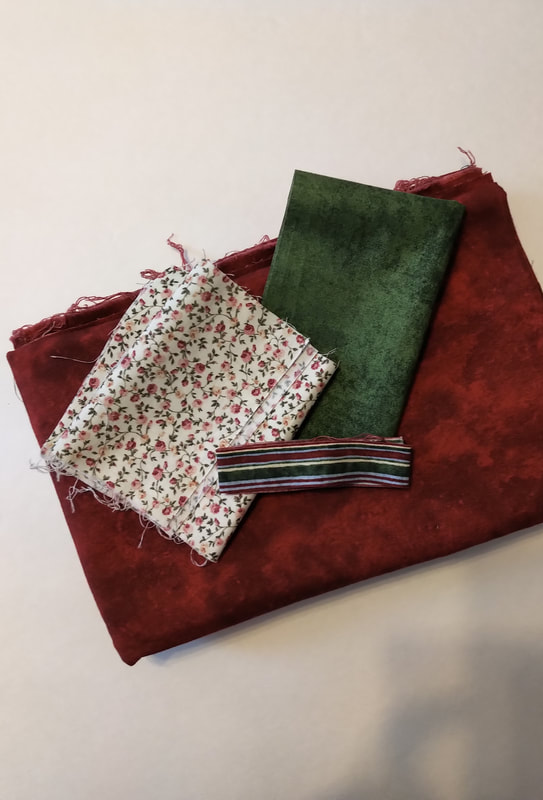
Modified Log Cabin Quilt Block Pattern
The Log Cabin Quilt Block is a popular pioneer pattern.
The pattern below includes the traditional red square in the middle that represents the hearth or fire and the rectangular strips that represent logs as seen in the traditional Log Cabin pattern. The arrangement of the pieces follows the Court House Steps pattern to simply the project for beginning quilters.
You will need:
one red square of fabric 3 1/2 inch x 3 1/2 inch
two patterned rectangles 3 1/2 in x 2 1/2 in
two solid coloured rectangles 7 1/2 in x 2 1/2 in
two patterned rectangles 7 1/2 in x 2 1/2 in
two striped rectangles 11 1/2 i x 2 1/2 in
scissors
ruler (with inches)
pins, sewing machine, iron
Optional:
quilt batting 11 1/2 inch square
additional fabric 11 1/2 inch square
Cut out each of the pieces listed above. Press each piece flat with a low temperature iron.
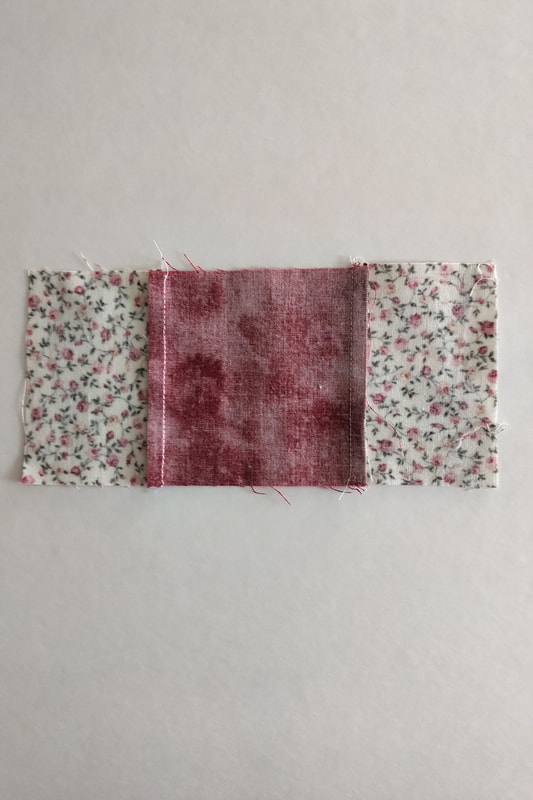
Step 1: start with the red square. Place the first patterned rectangle ( 3 1/2 in x 2 1/2 in) on top of the red square with right sides of each together. Pin together along the edge. Sew a seam 1/4 inch from the edge. Repeat this process, sewing the other patterned rectangle on the opposite side. Remove the pins and press the seams flat.
Step 2: place one of the solid rectangles (7 1/2 in x 2 1/2 in) along the side of the red square. Pin this piece to the square with right sides together. Sew a 1/4 inch seam. Sew the second solid rectangle to the opposite side of the red square. Remove pins and press seams flat.
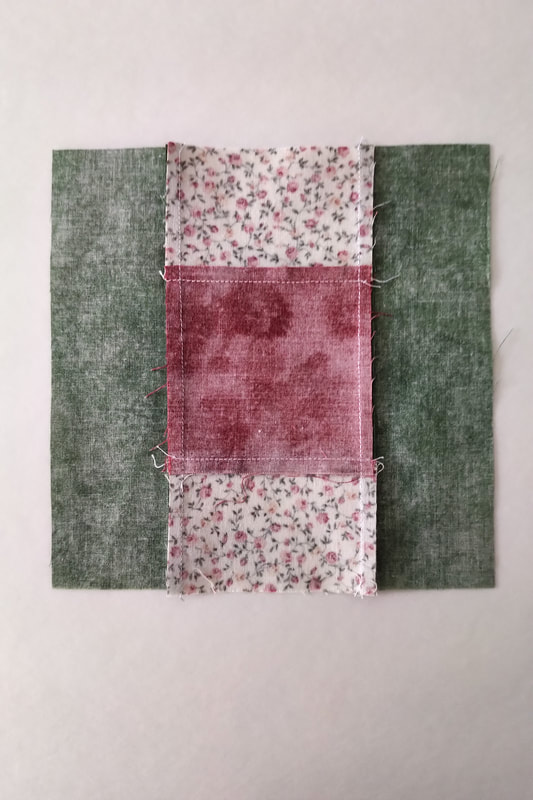
Step 3: in the same way, sew one of the patterned rectangles( 7 1/2 in x 2 1/2 in) to the side of the patterned rectangle (3 1/2 in x 2 1/2 in) and ends of the two solid rectangles. Sew the second patterned rectangle (7 1/2 in x 2 1/2 in) to the opposite end. Remove pins. Sew seams flat.
Step 4: sew one of the striped rectangles (11 1/2 in x 2 1/2 in) to the side of the solid rectangle and the ends of the patterned rectangles. Sew the second striped rectangle to the opposite end, remove the pins. Press seams flat.
This completes the basic quilt block.
Additional finishing steps:
You will need:
11 1/2 inch square of fabric
11 1/2 inch square of quilt batting
To finish the project, place the quilt block face up. Place the battling on top. Place the finishing square of fabric, face down, on top of quilt batting. Pin around the outside edges of the fabric. Sew around the outside edge, leaving a 2 inch opening. Turn the block inside out and finish by hand stitching the opening shut with a needle and thread.
The pattern below includes the traditional red square in the middle that represents the hearth or fire and the rectangular strips that represent logs as seen in the traditional Log Cabin pattern. The arrangement of the pieces follows the Court House Steps pattern to simply the project for beginning quilters.
You will need:
one red square of fabric 3 1/2 inch x 3 1/2 inch
two patterned rectangles 3 1/2 in x 2 1/2 in
two solid coloured rectangles 7 1/2 in x 2 1/2 in
two patterned rectangles 7 1/2 in x 2 1/2 in
two striped rectangles 11 1/2 i x 2 1/2 in
scissors
ruler (with inches)
pins, sewing machine, iron
Optional:
quilt batting 11 1/2 inch square
additional fabric 11 1/2 inch square
Cut out each of the pieces listed above. Press each piece flat with a low temperature iron.
Step 1: start with the red square. Place the first patterned rectangle ( 3 1/2 in x 2 1/2 in) on top of the red square with right sides of each together. Pin together along the edge. Sew a seam 1/4 inch from the edge. Repeat this process, sewing the other patterned rectangle on the opposite side. Remove the pins and press the seams flat.
Step 2: place one of the solid rectangles (7 1/2 in x 2 1/2 in) along the side of the red square. Pin this piece to the square with right sides together. Sew a 1/4 inch seam. Sew the second solid rectangle to the opposite side of the red square. Remove pins and press seams flat.
Step 3: in the same way, sew one of the patterned rectangles( 7 1/2 in x 2 1/2 in) to the side of the patterned rectangle (3 1/2 in x 2 1/2 in) and ends of the two solid rectangles. Sew the second patterned rectangle (7 1/2 in x 2 1/2 in) to the opposite end. Remove pins. Sew seams flat.
Step 4: sew one of the striped rectangles (11 1/2 in x 2 1/2 in) to the side of the solid rectangle and the ends of the patterned rectangles. Sew the second striped rectangle to the opposite end, remove the pins. Press seams flat.
This completes the basic quilt block.
Additional finishing steps:
You will need:
11 1/2 inch square of fabric
11 1/2 inch square of quilt batting
To finish the project, place the quilt block face up. Place the battling on top. Place the finishing square of fabric, face down, on top of quilt batting. Pin around the outside edges of the fabric. Sew around the outside edge, leaving a 2 inch opening. Turn the block inside out and finish by hand stitching the opening shut with a needle and thread.
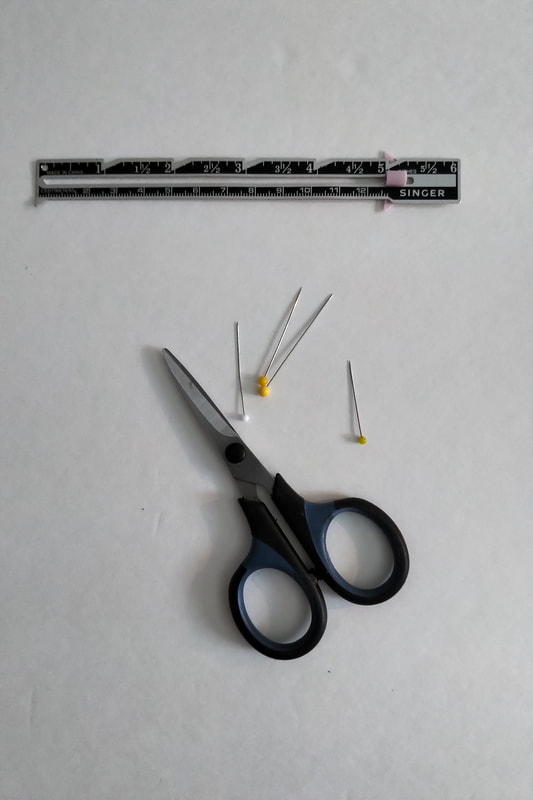
tools
|
material
|
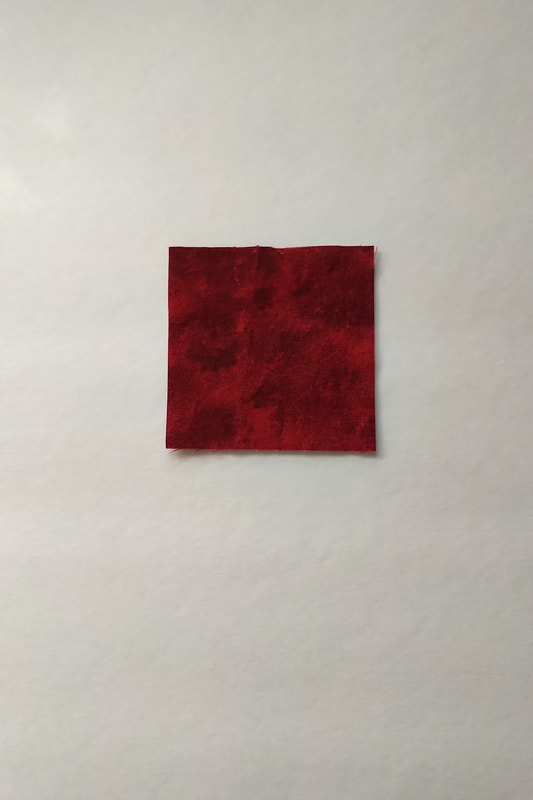
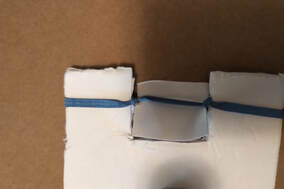
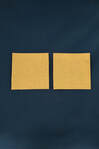
Step 1: start with a red square that measures 3 1/2 inches x 3 1/2 inches
|
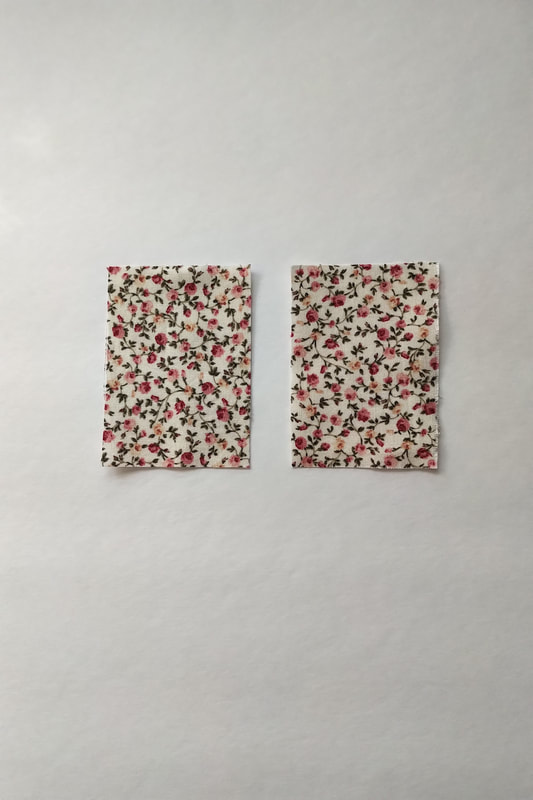
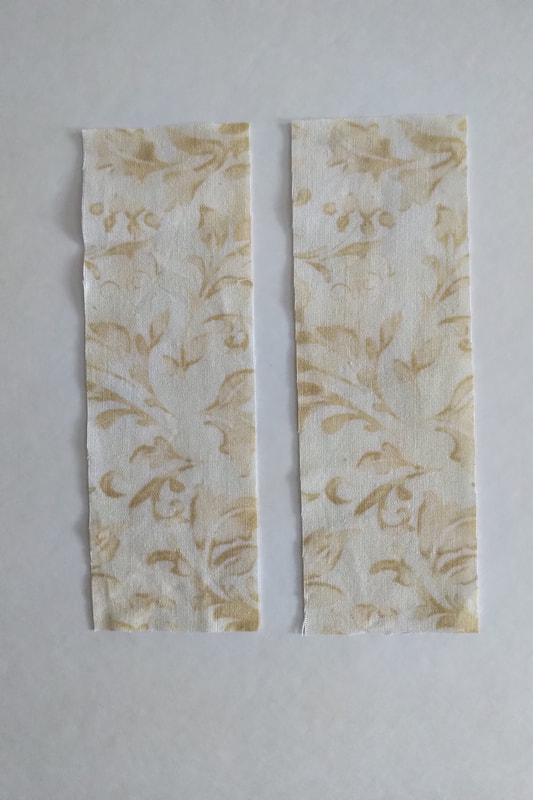
next cut two patterned rectangles measuring 3 1/2 inches x 2 1/2 inches
|
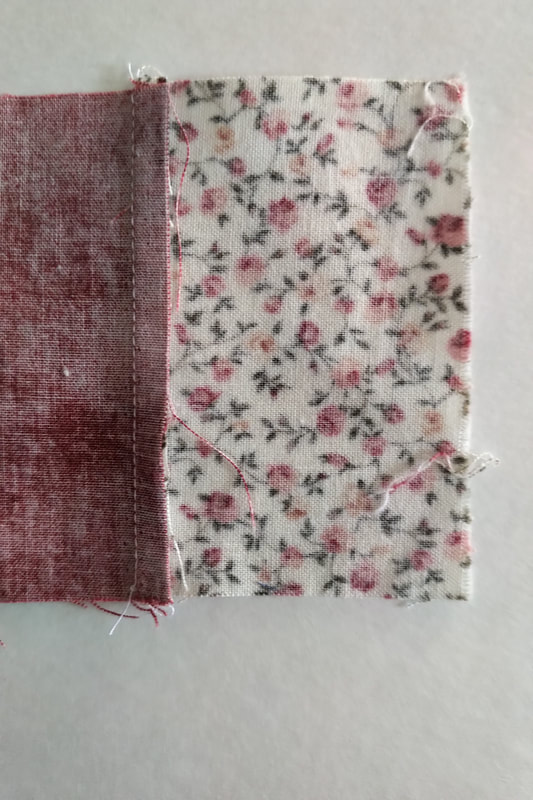
then sew a 1/4 inch seam along the side to attach the patterned rectangle to one side of the red square
|
sew the second patterned rectangle on the opposite side
|
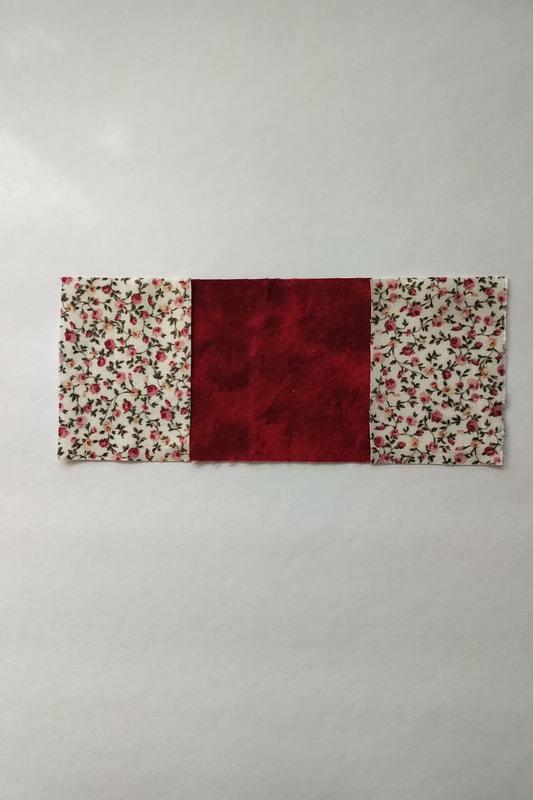
end of step 1
|

Step 2: cut two solid coloured rectangles measuring 7 1/2 inches x 2 1/2 inches
|
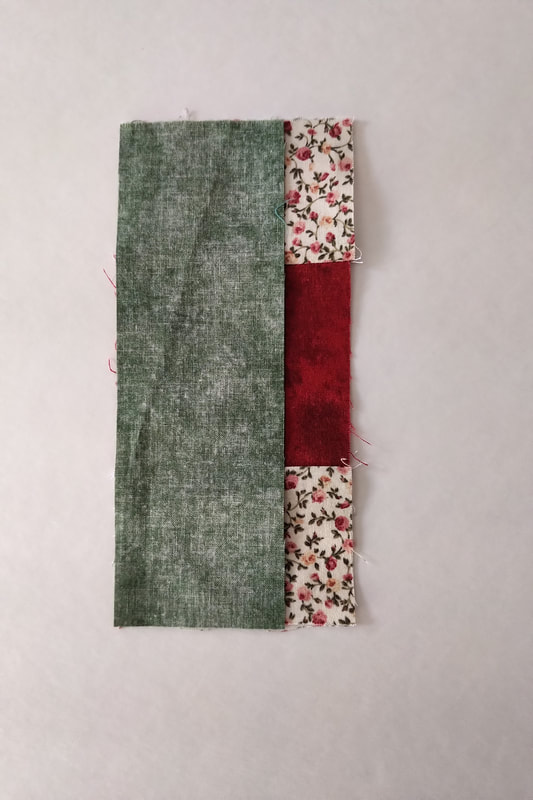
sew one of the solid coloured rectangles along the side of the red square and ends of the patterned rectangles
|
sew the second solid coloured rectangle along the opposite end
|
Step 3: cut two patterned rectangles measuring 7 1/2 inches x 2 1/2 inches
|
sew the 7 1/2 inch x 2 1/2 inch rectangle along the edge of the patterned rectangle and the ends of the solid coloured rectangles
|

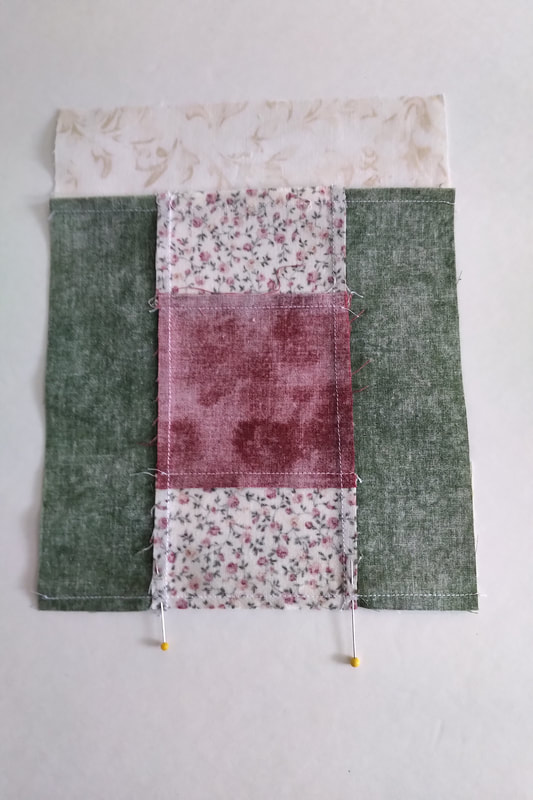
Step 4: sew the striped rectangle along the edge of the solid coloured rectangle and along the ends of the patterned rectangles
|
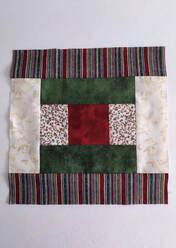
completed quilt block
|
Citrus and Fresh Herb Diffuser Gift
You will need:
glass or plastic jar with top
3 - 5 dried orange slices
sprigs of rosemary, pine or fir
3 - 4 cinnamon sticks
1 - 2 tablespoons cloves
2 - 3 star anise seed pods
instruction card, ribbon or string
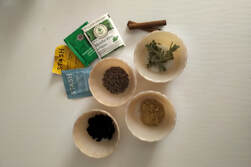
Gather materials. Fill a jar with dried fruit, sprigs of rosemary or pine and spices. Put top on jar.
Prepare an instruction card that says:
Add contents of jar to 2 - 3 cups of water and simmer to add natural scent to the air.
Attach the card to the jar.
Taken from: House and Home magazine Volume 42, # 10 November 2020
glass or plastic jar with top
3 - 5 dried orange slices
sprigs of rosemary, pine or fir
3 - 4 cinnamon sticks
1 - 2 tablespoons cloves
2 - 3 star anise seed pods
instruction card, ribbon or string
Gather materials. Fill a jar with dried fruit, sprigs of rosemary or pine and spices. Put top on jar.
Prepare an instruction card that says:
Add contents of jar to 2 - 3 cups of water and simmer to add natural scent to the air.
Attach the card to the jar.
Taken from: House and Home magazine Volume 42, # 10 November 2020
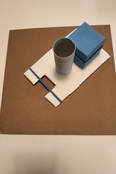
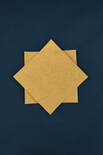
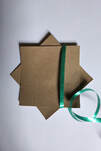
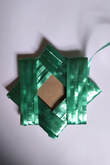
Photo Frame
You will need:
cardboard (two equal squares)
ribbon or yarn
glue or tape
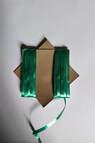
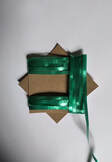
Cut two equal squares of cardboard and arrange them one on top of the other at an angle to form an eight point star shape. Secure them together with a drop of glue. Fasten the end of the ribbon in the centre of the back of the shape. Begin to wind the ribbon around the shape to form a pattern. The ribbon should stretch from one corner to the corner directly below it. Pass the ribbon to the back and bring it back to the front, beside the first strip of ribbon. Continue winding front to back until the section is covered. Pass the ribbon across the back to start winding it on the opposite side. Continue this process until all sides are covered. There will be a space in the middle to insert a photo.
cardboard (two equal squares)
ribbon or yarn
glue or tape
Cut two equal squares of cardboard and arrange them one on top of the other at an angle to form an eight point star shape. Secure them together with a drop of glue. Fasten the end of the ribbon in the centre of the back of the shape. Begin to wind the ribbon around the shape to form a pattern. The ribbon should stretch from one corner to the corner directly below it. Pass the ribbon to the back and bring it back to the front, beside the first strip of ribbon. Continue winding front to back until the section is covered. Pass the ribbon across the back to start winding it on the opposite side. Continue this process until all sides are covered. There will be a space in the middle to insert a photo.
|
|
|
|
|
|
Plantable Seed Paper
You will need:
paper
warm water
seeds (1 teaspoon)
strainer or screen
sponge or paper towel
plastic tub, bowl
vegetable masher or old blender
cookie cutter shapes (optional)
hair dryer (optional)
Tear the paper into very small pieces and put it into warm water in the plastic tub. Leave the paper pieces to soak in the water overnight to break down the paper fibers. Next, mash or blend the paper pulp until it is mushy. Stir in the seed, gently. Hold a strainer or piece of screen over a bowl and strain the water from the pulp. Discard the water. To dry, gently spread the pulp over a screen or flat surface. Pat the pulp with paper towel or sponge gently to remove any remaining moisture. Leave the pulp to dry for several days. Turn the paper over to allow it to dry thoroughly on both sides. Be patient. The drying process will take time. A hair dryer can be used to speed the drying process. If you want the paper to be a certain shape, you can place the pulp into a cookie cutter. Remove the cutter from around the pulp once the pulp is in the shape you want it to be. When the 'new' paper is completely dry, you can write a message on it using a fine tip marker. If you are giving the plantable seed paper as a gift, write planting instructions to tell the person who receives it to place it in soil and water it.
Foot Stones
You will need:
embroidery hoop
homemade clay (see recipe below) or use clay from a craft store
natural objects (leaves, twigs, pine cones, pebbles)
rolling pin or bottle
paint, paint brush (optional)
*if using the footstone outside, make sure paint is suitable to get wet
Work the clay in your hands to shape it into a ball. Use a rolling pin or bottle to flatten the clay to a circle slightly larger than the embroidery hoop. Press the hoop into the clay. Trim the edges around the hoop to create a round, circle shape. Place the collected natural materials in a design. Press the natural materials into the clay. Carefully, peel the items back out of the clay to leave the imprint in the clay. Remove the hoop. Leave the clay to dry for several days. You will need to flip it over half way through the drying time or place it on a cold oven rack so the air can circulate around it. When the clay is dry, you can use paint to make the imprints stand out or paint the entire footstone.
Inspired by the art of Ronni Robinson's Floral Fossils in House Beautiful magazine Dec 2020/Jan 2021
Clay recipe:
You will need:
4 cups flour
1 1/2 cups salt
1 1/2 cups water
bowl, spoon, pastry board
Mix flour and salt. Add water gradually while stirring. Place on a pastry board (or flat surface) and knead until well blended. Form into a ball.
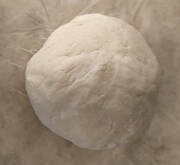
homemade clay
|
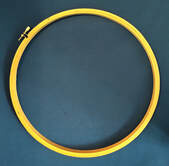
embroidery hoop
|
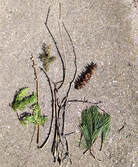
things from nature
|
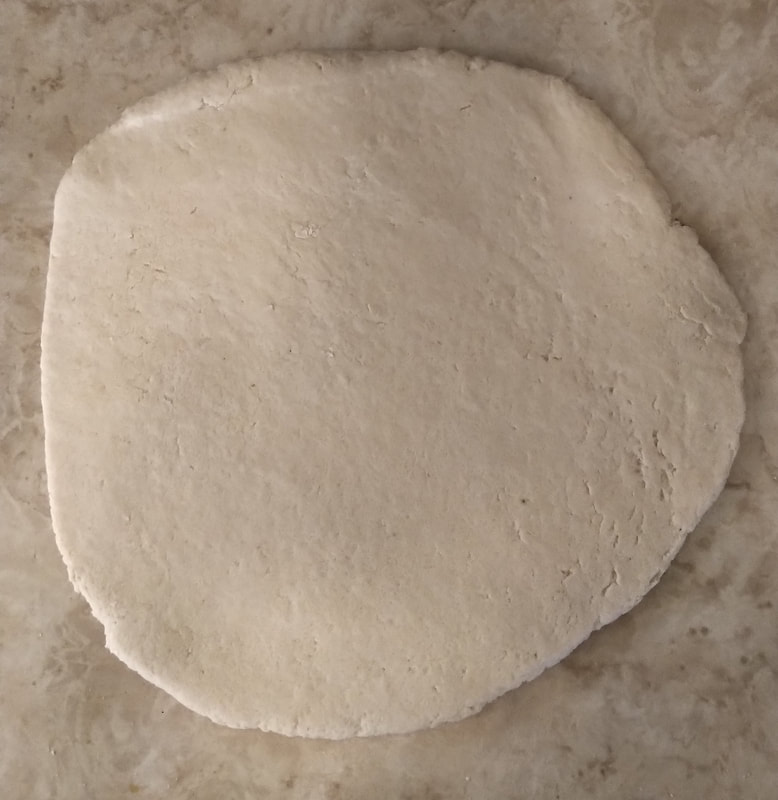
roll the dough out flat to form a circle shape
|
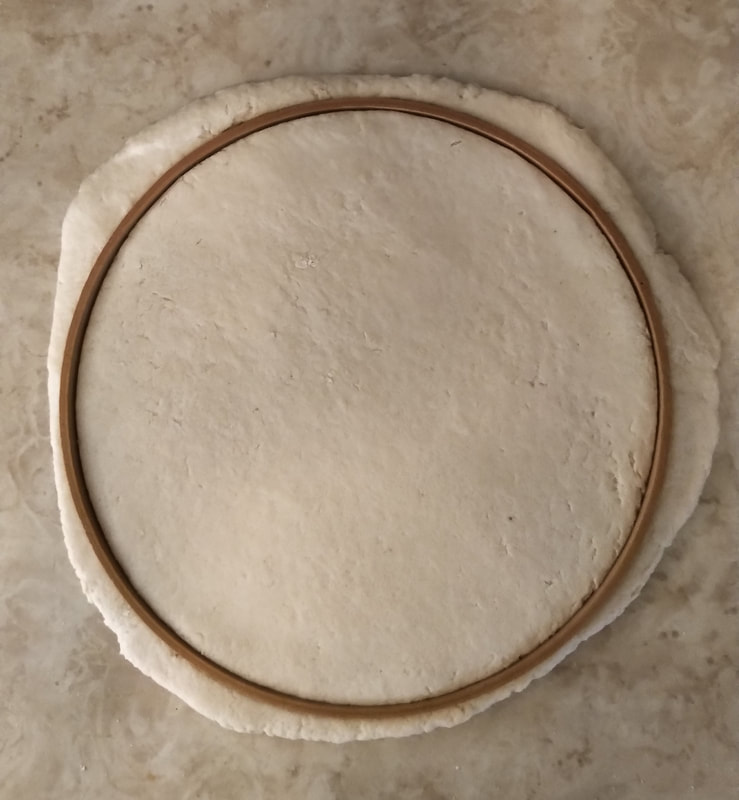
place the hoop on top of the clay and press down, then trim around the edges of the hoop to remove the extra clay
|
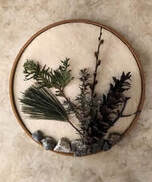
add the materials from nature to the clay and press down gently on them
|
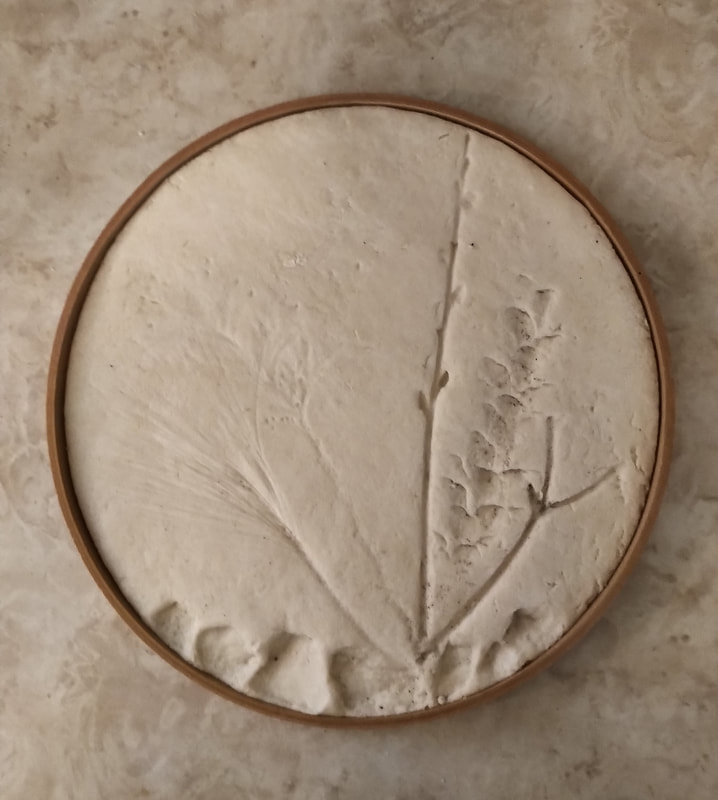
carefully remove the natural materials from the clay to leave the impressions, then after the clay has hardened, use paint to highlight the impressions
|