Welcome to Grandpa's Garden.
Here you will find information and activities about the world around you.
Throughout history, people have learned to live in harmony with nature in order to survive. The Anishinaabe Nation have a rich history and connection with nature on Turtle Island. They have been the caretakers of this land and water for thousands of years. The land between the two great rivers provided abundant resources to sustain them. Just as First Nations people protected the land for generations, it is important for youth to learn about the environment so they can protect it in the future.
Now that you are ready to explore your environment, it is important to make sure you do not harm it. Good environmentalists follow some basic rules that protect nature while enjoying and observing it. Nature is the home of birds and animals. Just like we are careful not to damage other people's homes when we visit, we need to make sure we do not change the area we are studying. Items should be left where they are found. Remember, if you take things away, you might be removing a creature's lunch. To be a true protector, we can look at and enjoy, but do our best not to change nature. We can share the space as long as we are respectful of it and the creatures who live there.
Here's a fun video to let you see what's out there in nature when we're not looking...
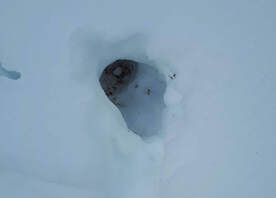
Click on the picture of the beaver lodge below to see what passes by in a year.
Click on the picture of the beaver lodge below to see what passes by in a year.

Animal Tracks
Exploring animal tracks is an excellent way to learn about their lives. In winter, tracks in the snow are easy to follow. Look around your yard or local park to see if there is any evidence an animal has travelled through it.
You will need:
journal to record evidence (can be made by folding and stapling sheets of paper)
pencil
ruler
magnifying glass (optional)
reference book about tracks (optional)
Find an area where the snow has not been disturbed by humans.
Look around the base of trees. Always look before you step so you will not walk on the tracks.
When you spot a track, stop and observe it. Look for the path it takes and follow it with your eyes first. Observe how many toes and claws you can count and the shape of the pad (base) of the track.
Sketch the track in your journal. Record where the track is located and its measurements.
Ask these questions:
Are the tracks beside each other or one after another?
Can you see a front foot and a back foot?
Can you tell if the creature was walking, running or hopping? How can you tell?
Did the creature continue to travel in the same direction or zigzag around?
Was the creature heading to its home or searching for food?
Is there evidence of one creature chasing another?
Can you figure out what animal made this track? Use a track book to help confirm the identity of the animal who made the track.
Record all the information you learn in your journal.
Your Animal Journal could include:
Name of animal
Description of animal
Colours
Size (length, height. weight)
Special features
Habitat (where it lives)
Detailed drawing of animal
Drawing or photo of tracks
Name of animal
Description of animal
Colours
Size (length, height. weight)
Special features
Habitat (where it lives)
Detailed drawing of animal
Drawing or photo of tracks
A raccoon and its habitat.
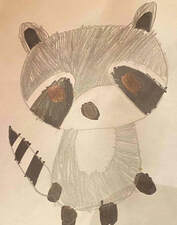
artwork by Callum
|
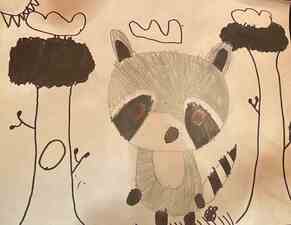
artwork by Callum
|
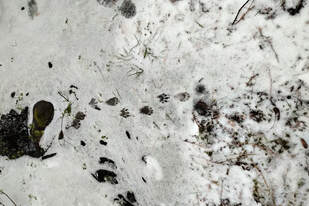
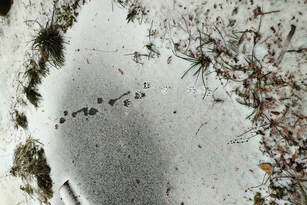
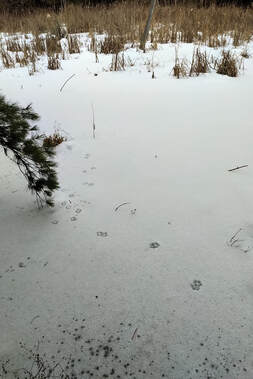
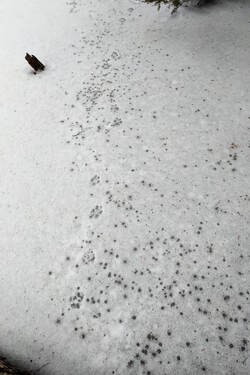
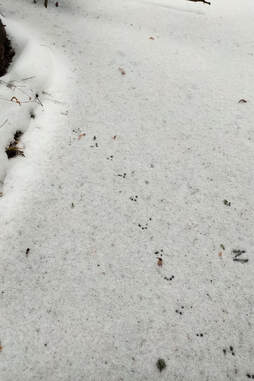
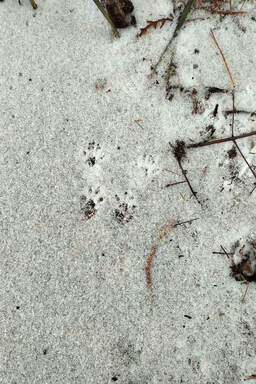
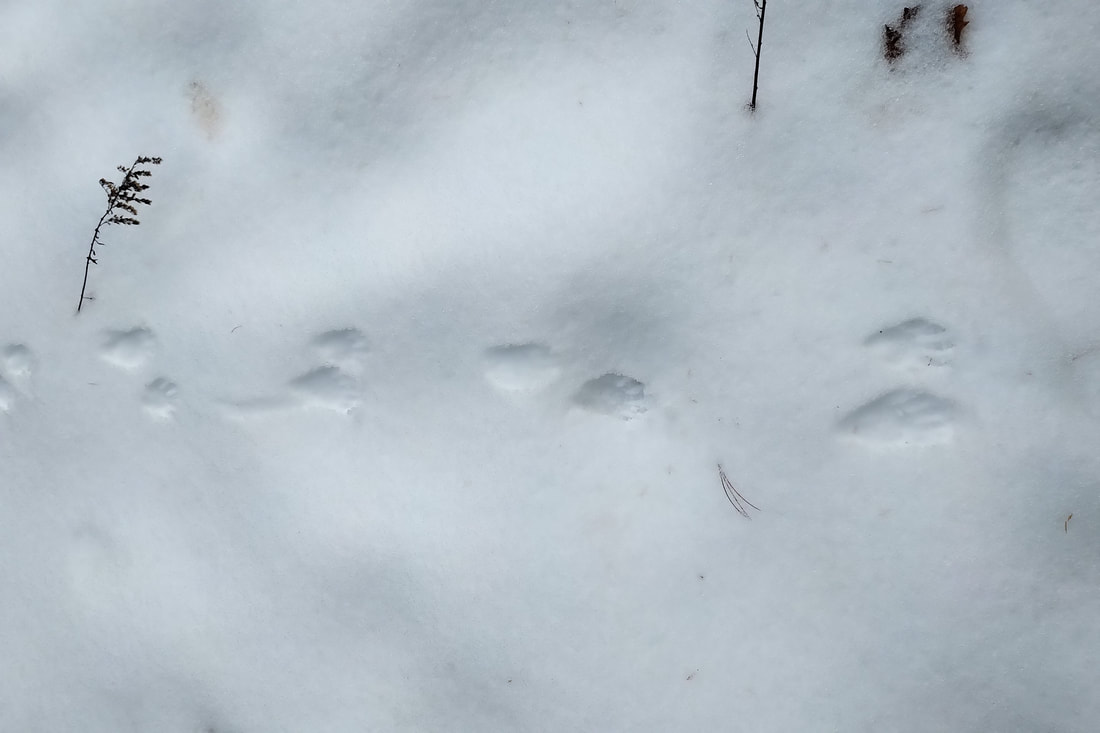
Photographs of animal tracks in a woodland habitat.
Can you identify who made these tracks?
|
|
|
|
|
|

|
|
Here are some helpful links to help you identify tracks you find.
Canadian Wildlife Federation
Discovering the World of Wildlife Tracks
Nature Tracking Five Backyard Species
Animal Track Identification Guide
Canadian Wildlife Federation
Discovering the World of Wildlife Tracks
Nature Tracking Five Backyard Species
Animal Track Identification Guide
Snowshoes
Have you ever wondered how humans came up with the idea for snowshoes. Well, look to nature! If you examine the feet of a Snowshoe Hare or a Canadian Lynx, you are well on your way to finding an answer. Indigenous hunters used tracks in the snow to follow animals. In deep snow, it was difficult to keep up with the animals. They saw how some animals could travel easily on top of the snow. Indigenous hunters often used wood like ash or birch to make a frame. They fastened a kind of webbing across the frame with rawhide from animals they had hunted. This 'snow shoe' helped hunters travel on top of the deep snow without sinking. This meant that the hunters could follow the animals they were hunting all winter long.
Learn about snowshoes here.
Check out a Snowshoe Hare.
Learn about the Canadian Lynx here.
Artifacts from the Middleville and District Museum
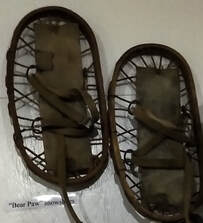
Bearpaw Snowshoes
|
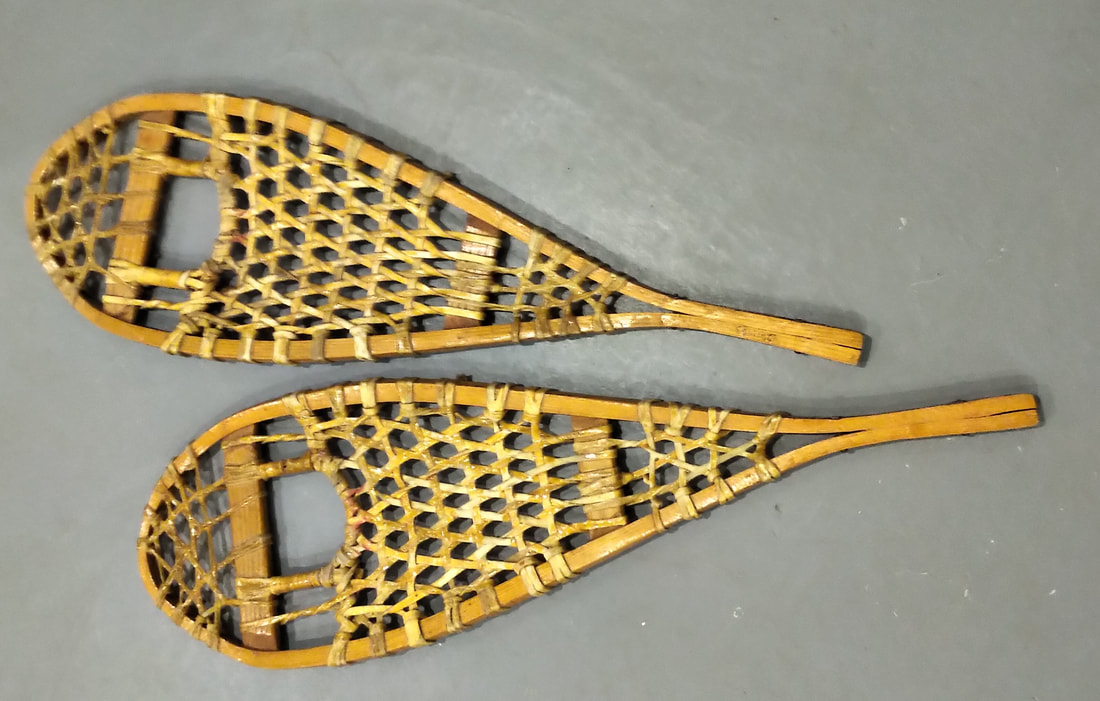
Snowshoes
|
Animal Homes
Animals use the materials they find in nature to build their homes. Just like settlers relied on the trees and soil on their land, animals gather what they can find nearby. They choose locations for their homes where there is a good supply of the materials they need.
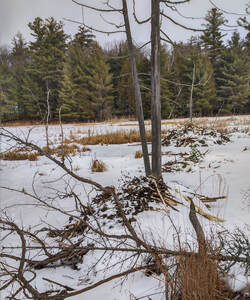
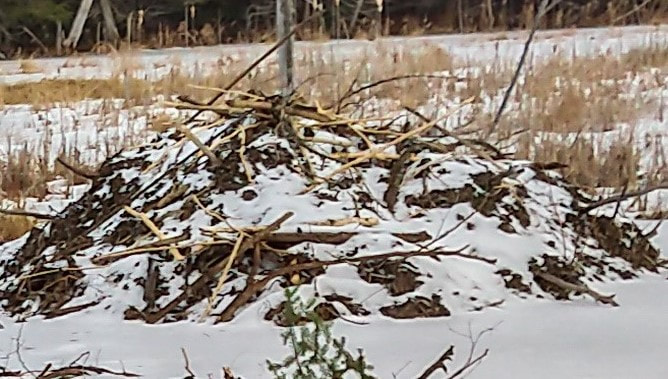
The beaver is one of the best engineers when it comes to building in the wild. They cut down trees, use branches and collect mud to build a shelter for their family.
When they first came to Canada, settlers cut down trees, used mud, twigs and moss to pack holes between logs and branches to fill mattresses. Settlers also packed down sol to make a dirt floor. A beaver family forms a mound of soil inside their lodges to provide a floor.
Muskrats build their homes with sticks, as well. They use mud and leaves to fasten the sticks together in a dome shape. Holes are filled with mud and leaves to make their homes weather proof.
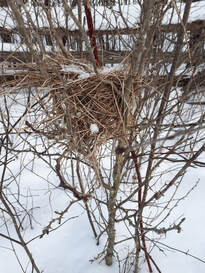
Many types of birds use mud to fasten sticks together, as well. They spend many hours gathering sticks and leaves to weave a nest for their families.
Draw pictures of animal homes that use sticks, leaves, moss and mud as building materials. Add these drawings to your Animal Tracks Journal.
If you live near a park or wildlife reserve, look for signs of places animals live. If you can't visit, in person, look up wildlife conservation area websites online.
Here's one to try:
Rideau Valley Conservation Area
The beaver is one of the best engineers when it comes to building in the wild. They cut down trees, use branches and collect mud to build a shelter for their family.
When they first came to Canada, settlers cut down trees, used mud, twigs and moss to pack holes between logs and branches to fill mattresses. Settlers also packed down sol to make a dirt floor. A beaver family forms a mound of soil inside their lodges to provide a floor.
Muskrats build their homes with sticks, as well. They use mud and leaves to fasten the sticks together in a dome shape. Holes are filled with mud and leaves to make their homes weather proof.
Many types of birds use mud to fasten sticks together, as well. They spend many hours gathering sticks and leaves to weave a nest for their families.
Draw pictures of animal homes that use sticks, leaves, moss and mud as building materials. Add these drawings to your Animal Tracks Journal.
If you live near a park or wildlife reserve, look for signs of places animals live. If you can't visit, in person, look up wildlife conservation area websites online.
Here's one to try:
Rideau Valley Conservation Area
Can you identify who built these homes and other structures?
|
|
|
|
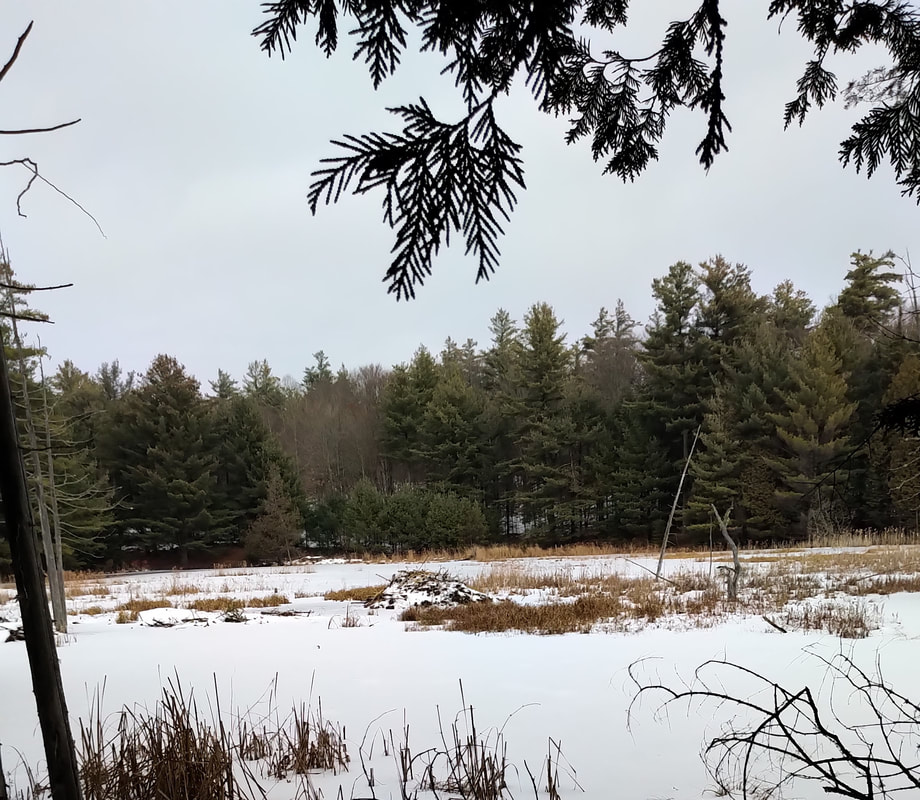
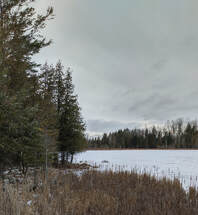
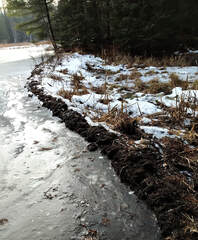
Can you spot the animal home?
|
|
Who do you think lives here?
|
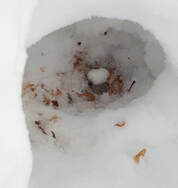
Look closer.
|
Birdwatching
Birdwatching is a fun activity, especially in winter when they like to gather at a feeder.
Sometimes it is helpful to build a temporary structure, or blind, to observe creatures in the wild without them knowing you are watching.
If you want to observe the activity around a bird feeder, you could disguise yourself so the birds will feel comfortable enjoying the feeder and you can watch their natural behaviour. First, try to dress in clothes that match the environment.
Choose a place far enough away from the feeder so the birds won't notice, but close enough that you can see the details of the birds that visit.
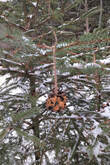
You want your structure to look as natural as possible. If you have an evergreen tree nearby, it provides good coverage. Look for any tree or shrub that could provide some disguise and try to set up your observation camp behind it. If you have a tarp or garbage bag split along the seams, place it on the ground at the base of the tree to keep yourself dry. Place a blanket or large piece of cardboard from a box on top of the plastic so you have a good surface to sit on. If you can find a box big enough for you to fit inside, you could cut a small opening to look through without being seen by the birds.
Next, set up your tools for observation. A clipboard is helpful to hold your paper and make a good writing surface. You also need a pencil. A bird identification book is useful. If you have a pair of binoculars, take these along, too.
Choose an amount of time to observe and record the types of birds you see and how many of each species are present.
Questions to think about:
Do the birds arrive at the feeder in flocks, in pairs or alone?
Do all the birds get along with each other? If not, which birds are dominant (bossy)?
Are the dominant birds bigger?
Which birds are noisy and which birds are quiet?
Do the birds eat at the feeder or do they carry the food away with them to another location?
Make a journal to record your observations.
You might want to make a chart to organize your information.
Here are some ideas you could use to make your chart:
name of bird (cardinal)
colours (red, brown, yellow)
special features (crest, tuft) (crest on head)
size (small/medium/large) (medium)
flock/pair/single (pair)
number observed today (2)
Once you have recorded your first observations, you may want to keep track of the numbers and types of birds that visit your feeder for a time period of a week. You can create a bird census with an easy tally sheet.
Cardinal //
Blue Jay ///
Chickadee //// ///
If you have a local park or conservation area and are able to visit it with a parent or grandparent, take along your journal or tally sheet to record what birds you see and hear. Don't forget to take along your bird identification book and binoculars if you have these.
Sometimes it is helpful to build a temporary structure, or blind, to observe creatures in the wild without them knowing you are watching.
If you want to observe the activity around a bird feeder, you could disguise yourself so the birds will feel comfortable enjoying the feeder and you can watch their natural behaviour. First, try to dress in clothes that match the environment.
Choose a place far enough away from the feeder so the birds won't notice, but close enough that you can see the details of the birds that visit.
You want your structure to look as natural as possible. If you have an evergreen tree nearby, it provides good coverage. Look for any tree or shrub that could provide some disguise and try to set up your observation camp behind it. If you have a tarp or garbage bag split along the seams, place it on the ground at the base of the tree to keep yourself dry. Place a blanket or large piece of cardboard from a box on top of the plastic so you have a good surface to sit on. If you can find a box big enough for you to fit inside, you could cut a small opening to look through without being seen by the birds.
Next, set up your tools for observation. A clipboard is helpful to hold your paper and make a good writing surface. You also need a pencil. A bird identification book is useful. If you have a pair of binoculars, take these along, too.
Choose an amount of time to observe and record the types of birds you see and how many of each species are present.
Questions to think about:
Do the birds arrive at the feeder in flocks, in pairs or alone?
Do all the birds get along with each other? If not, which birds are dominant (bossy)?
Are the dominant birds bigger?
Which birds are noisy and which birds are quiet?
Do the birds eat at the feeder or do they carry the food away with them to another location?
Make a journal to record your observations.
You might want to make a chart to organize your information.
Here are some ideas you could use to make your chart:
name of bird (cardinal)
colours (red, brown, yellow)
special features (crest, tuft) (crest on head)
size (small/medium/large) (medium)
flock/pair/single (pair)
number observed today (2)
Once you have recorded your first observations, you may want to keep track of the numbers and types of birds that visit your feeder for a time period of a week. You can create a bird census with an easy tally sheet.
Cardinal //
Blue Jay ///
Chickadee //// ///
If you have a local park or conservation area and are able to visit it with a parent or grandparent, take along your journal or tally sheet to record what birds you see and hear. Don't forget to take along your bird identification book and binoculars if you have these.
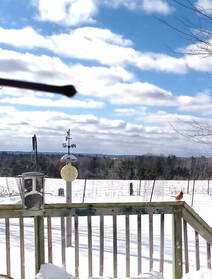
a cardinal resting on a railing
|
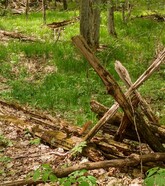
Who lived here?
|
When the seasons start to change, birds sometimes need our help. You can make a natural bird feeder to provide a snack for the birds. (Be sure to return natural materials to nature.)
Natural Bird Feeder
You will need:
pine cone
peanut butter
birdseed
plastic knife
foil pan or plate
yarn or string
Put birdseed in pan. Put string around the top of the pinecone (stem) and tie a knot to form a loop.
Use knife to add peanut butter on pinecone. Roll pinecone in seed.
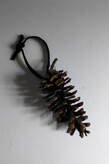
Hang pinecone on a tree branch for the birds in your yard.
pine cone
peanut butter
birdseed
plastic knife
foil pan or plate
yarn or string
Put birdseed in pan. Put string around the top of the pinecone (stem) and tie a knot to form a loop.
Use knife to add peanut butter on pinecone. Roll pinecone in seed.
Hang pinecone on a tree branch for the birds in your yard.
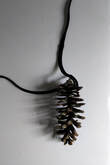
tie string around pinecone
|
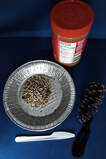
gather items needed
|
make a loop with string
|
hang the birdfeeder in a tree
|
Spring Observations
Spring is a great time for observation. Everything is changing. Each day brings something new to see.
You can record the changes in temperature and precipitation (rain, snow).
You will need:
paper, pencil
thermometer
calendar (optional)
Make a chart or use a calendar to record the temperature each day. Try to read the thermometer at about the same time every day. Make sure to use the same scale (Celsius 'C' that we use or Fahrenheit 'F' that the settlers used) each time. Look for patterns.
Note the weather (rain, snow, sunshine, cloud) you see for each day.
You can record the phases of the moon at bedtime by looking at the night sky out your window. Check out the
Old Farmer's Almanac for Kids online for information about moon phases.
Indigenous people watched the phases of the moon and the activity of the birds and animals carefully. They looked to signals in nature for clues of when to start and stop activities in their lives.
Settlers learned to rely on signs in nature to plan their activities.
Keep a journal to record the signs of spring you spot. Include your observations of birds, animals and plants in your journal.
Here are some questions to get you started with your observations:
Which birds return from the warmer southern climate first? When do animals come out from hibernation? What activities do you see the birds and animals doing in spring? What plants start to grow first? What happens to trees?
How do you plan and change your activities when the weather changes?
spring bulbs beginning to grow
|
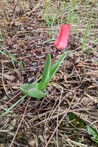
tulips
|
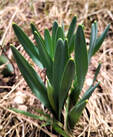
spring shoots
|
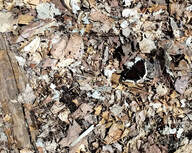
Can you spot the signs of spring in these pictures? Some of them are hiding.
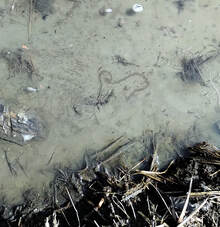
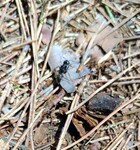
look very carefully to spot a worm's track in this mud puddle
|
this butterfly is resting in the sunshine to warm up
|

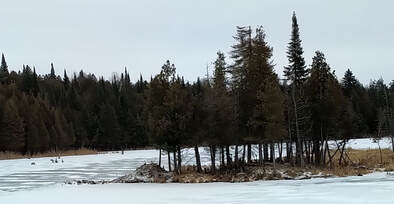
these trumpeter swans have arrived back to their spring home...hint: look on the other side of the island and beaver's lodge
|
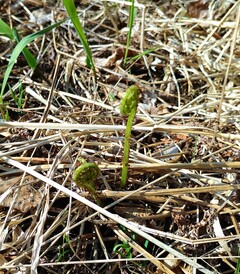
fiddleheads poking through the ground
|
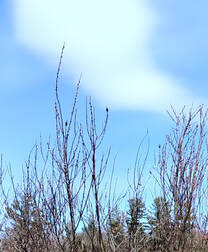
pussywillows
|

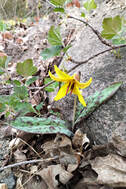
a dog tooth violet blooming in the woods
|
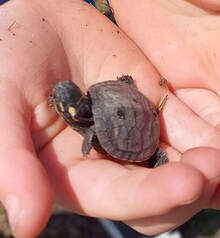
a baby turtle needing some help to find its way to the water
|
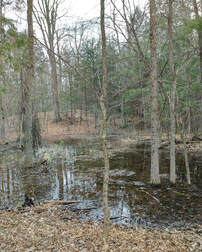
a pond full of life...who lives here?
|
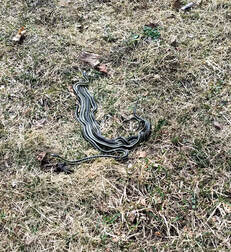
snakes warming themselves in the spring sunshine
|
Earth Day
Indigenous people lived in harmony with nature. This means they took care of the environment and the environment took care of them by providing what they needed. Before there were stores to buy things, people found ways to survive by using what they found in nature all around them.
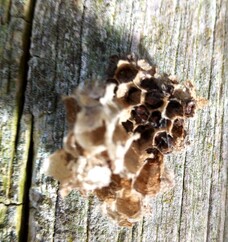
Indigenous people had knowledge of bees and they followed honey bees to a hive to find the honey the bees made. The honey could be used to sweeten their food. They also knew that bees were necessary to pollinate the plants that provided food for their families. Settlers learned to use honey from nature. They also built bee boxes to harvest the honey.
Indigenous people had knowledge of bees and they followed honey bees to a hive to find the honey the bees made. The honey could be used to sweeten their food. They also knew that bees were necessary to pollinate the plants that provided food for their families. Settlers learned to use honey from nature. They also built bee boxes to harvest the honey.
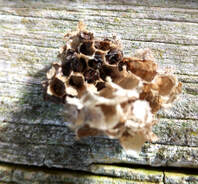
natural honeycomb
|
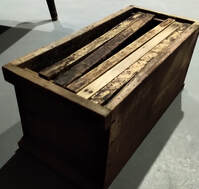
bee box built by settlers found at the Middleville and District Museum
|
There are 16 000 species of bees in the world. Changes in the world's climate are making it more difficult for bees to survive. Just like we look after plants in our house or garden, bees are nature's gardeners and look after the plants in the wild by taking pollen from one plant to another. That helps the plants to survive and grow more plants.
This year the theme for Earth Day is 'Restore Our Earth'.
This means we need to bring back safe habitats (where they live) for insects that help us, like bees.
This year the theme for Earth Day is 'Restore Our Earth'.
This means we need to bring back safe habitats (where they live) for insects that help us, like bees.
Here are some projects you can do to protect bees and help them to play their part in our environment.
* Always remember to practice safety when dealing with wild insects. Bees should not be touched or disturbed. When choosing a location for a house or garden for a bee, remember to keep it away from where people will be passing by.
Project number one:
Bee House
You will need:
small box
several paper rolls
twigs, leaves, bark, straw, dried stems
Collect natural materials. Stuff each paper roll with natural materials. Place the rolls in the box. Add extra natural material around the outside of the rolls to keep them secured in the box. Turn the box so that the rolls are horizontal. Place the box in a safe place and make sure it will stay in place.
Try to put the box opening in the direction that it will get the most sunlight.
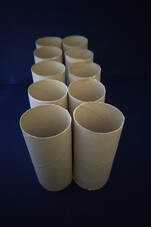
paper rolls
|
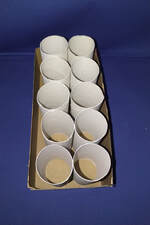
fill a box with the paper rolls
|
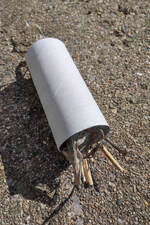
stuff each paper roll with natural materials
|
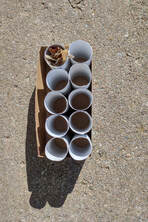
place the stuffed rolls into the box
|
Mason Bee variation:
You will need:
brown paper
pencil
paper carton (milk or juice)
scissors
Mason bees are very solitary. That means they like lots of alone time. Make hollow tubes by wrapping some brown paper tightly around a pencil. Slide the roll off the pencil and place the rolls together inside the paper carton. Place the carton on its side in a sunny spot. Add some sandy clay to the ground nearby. Mason Bees need clay to make mortar like a stone mason builder would do. Put a very shallow amount of water in a flat lid nearby.

mason bee house:
notice the tubes where the mason bees will lay their eggs inside and then close the opening with 'mortar' they make from clay
Project number two:
Plant a Pollinator Garden
You will need:
flower bed or container
soil
seeds or seedlings
garden tool
Purchase seeds or seedlings that will attract bees. You will want to position your garden or container away from a high traffic area for the safety of the bees and your family.
Prepare the soil by loosening it with a garden tool. Follow the directions for planting on the seed package or seedling tag.
Bees are fond of purple and blue coloured flowers. They also need a flat landing surface to light on so flowers with broad petals are best.
For a list of bee friendly flowers click on the blue flower.

For more ideas about how you can help bees, follow this link.
Spring: the planting season
Spring is the perfect time to get started growing things. You can get some sprouts going by using plants that have already grown or starting some from seeds. Both activities can be fun.
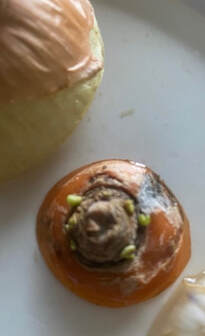
To start sprouts from plants that have already grown, save some pieces of left over vegetables and place them in a shallow pan of water. Leave them in a sunny spot for a few days. Check on them every few days to see if you can spot any signs of sprouts growing.
Settlers always made sure they kept some of their crop from the year before to start a new crop. Potatoes were stored in the root cellar and brought out to be cut into sections and planted to produce a new crop the next spring.
Settlers always made sure they kept some of their crop from the year before to start a new crop. Potatoes were stored in the root cellar and brought out to be cut into sections and planted to produce a new crop the next spring.
carrot with tiny sprouts growing
|
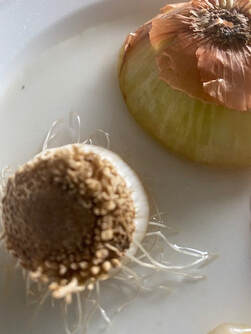
onion
|
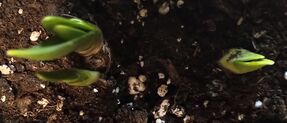
To start plants from seed, you just need a little bit of soil, some water and a sunny place like a windowsill. You can fill a tray with soil or plant seeds in their own little containers. The seeds below are being planted in individual soil pods. It's a good idea to use a spray bottle when watering so you don't drown the baby seeds. You should follow the instructions on the back of the seed packet when planting your seeds. If you are planting seeds you have gathered from a vegetable like a sweet pepper, make a small depression in the soil with the tip of your finger. Then plant the seeds in the depression and cover them lightly with soil. Place the container in a warm area where it will get lots of sunshine. Water the soil gently with the spray bottle each day. If you are using soil pods, you can plant these directly into a larger container of soil when the seedlings have grown. The seedlings will need more soil to support their roots when they grow bigger. In June, you can transplant your seedlings into a garden or move the containers outside.
Settlers always collected seeds in the fall at harvest time and carefully saved them all winter long. These seeds were planted in the late spring to start a new crop to feed the family for another year. Some seeds were brought over to their new home in their travel trunks when they came across the ocean from their homelands.
Settlers always collected seeds in the fall at harvest time and carefully saved them all winter long. These seeds were planted in the late spring to start a new crop to feed the family for another year. Some seeds were brought over to their new home in their travel trunks when they came across the ocean from their homelands.
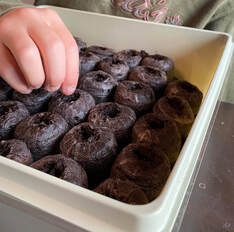
carefully planting seeds
|
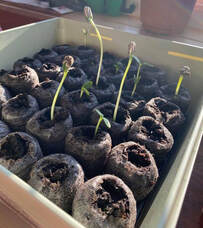
seedlings growing in a sunny windowsill
|
Scavenger Hunt
Indigenous people and settlers were always searching the environment for things they needed. They even followed honeybees through the forest to find their honeycomb.
Looking for things in nature is a great way to learn about the environment.
Here are some ideas to get you started.
Use a camera or paper and pencil to record what you find.
You can add up points for each thing you discover. What will be your score?
5 point items:
pine cone
dandelion
wildflowers
ant
ant hill
thistle
spider
spider web
ladybug
butterfly
blossoms
squirrel
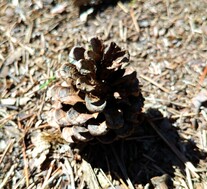
pinecone
|
dog tooth violet
|
squirrel
|
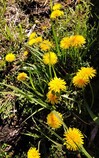
dandelions
|

butterfly
|
nest
|
ant
|
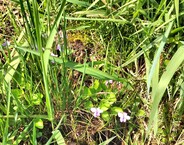
violets
|
10 point items
feather
pussy willows
fern
fiddleheads
honey comb
hummingbird
bumble bee
cocoon
bird nest
lilacs
acorn
moth
chipmunk
worm
tadpoles
frog
feather
pussy willows
fern
fiddleheads
honey comb
hummingbird
bumble bee
cocoon
bird nest
lilacs
acorn
moth
chipmunk
worm
tadpoles
frog
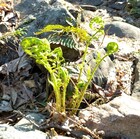
fiddleheads
|
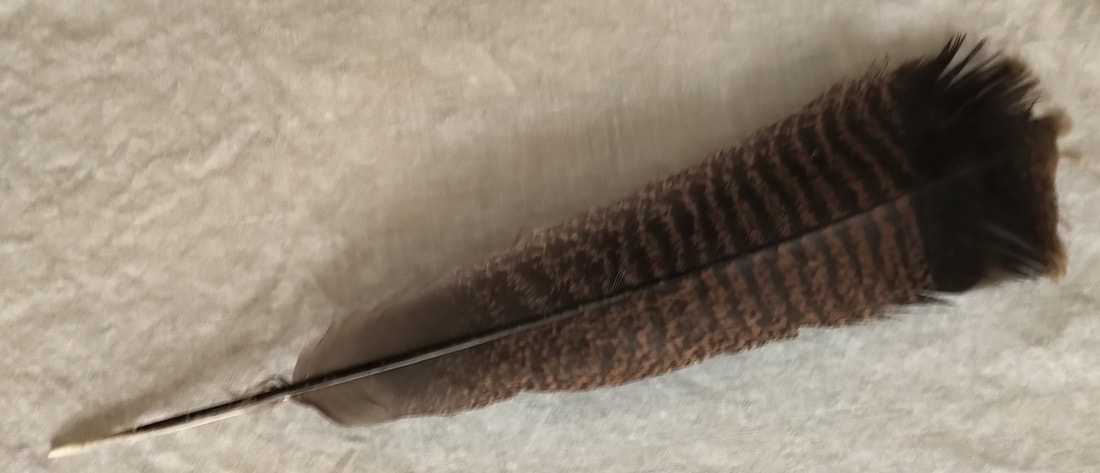
feather
|
honeycomb
|
25 point items
ducks
turtle
rabbit
snake
mouse
snail
minnows
woodpecker
wild animal tracks in the sand
ducks
turtle
rabbit
snake
mouse
snail
minnows
woodpecker
wild animal tracks in the sand
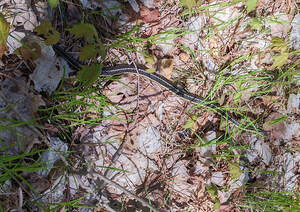
snake
50 point items
skunk
groundhog
raccoon
swan
loon
owl
hawk
toad
partridge or grouse
skunk
groundhog
raccoon
swan
loon
owl
hawk
toad
partridge or grouse

swans
|
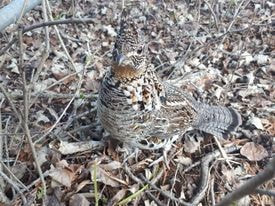
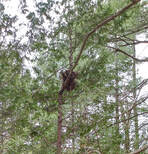
grouse
|
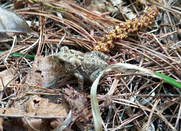
toad